2005-20 Keys light press mod
Modding, Keyboard

⏱️Overview
This is a guide about my modification of reducing rubberdomes in keboards to acheive a light press effect. After this procedure keyboards can have much less actuation force (needed to press keys). It is separated from my other projects which describe my keyboard controllers.
✍️Motivation
My motive is pretty straightforward: I want my keyboards to require as little effort to type as possible. And I don’t want any injuries from using my keyboards. These come from fatigue, which comes from more effort to press keys. I found once a pdf writing about this in detail, but don’t have a link.
Fatigue also comes from lots of repeated pressing, but this is another thing. I can’t change it (much) if my hobby or work needs it. I do have helpers on display in my controllers (K.C. and K.C.4) showing: total/daily key press count, rate of key presses per minute, a graph with rate over time, and time I’m active typing without a break.
So back in 2005 I saw those rubberdomes and thought: “how about I reduce them”. Then there was immediately this problem that they need to be glued back. Well after I did all that, it actually took like 2 weeks to get used to my modified keyboard. I wasn’t sure if this mod will last, but it did. After a while of using, it was easy to understand, that keyboards are really badly and cheaply made and I think it’s just a history thing (just like the thing about this idiotic Qwerty layout), surely not a sum of only intelligent decisions.
I’m glad I did this process, and just before writing over 120 pages of my master thesis on this modded keyboard, which now was nice to use and wasn’t meant to injure me. I did a second one for work at some point.
I remember once on a keyboard back there was a warning about possible injuries, seemed unreal to me back then, yet it is true, I even once made such mod for a person, who paid and even later thanked me numerous times, because he is suffering from that injury and such keyboard makes less pain to use.
ℹ️Information
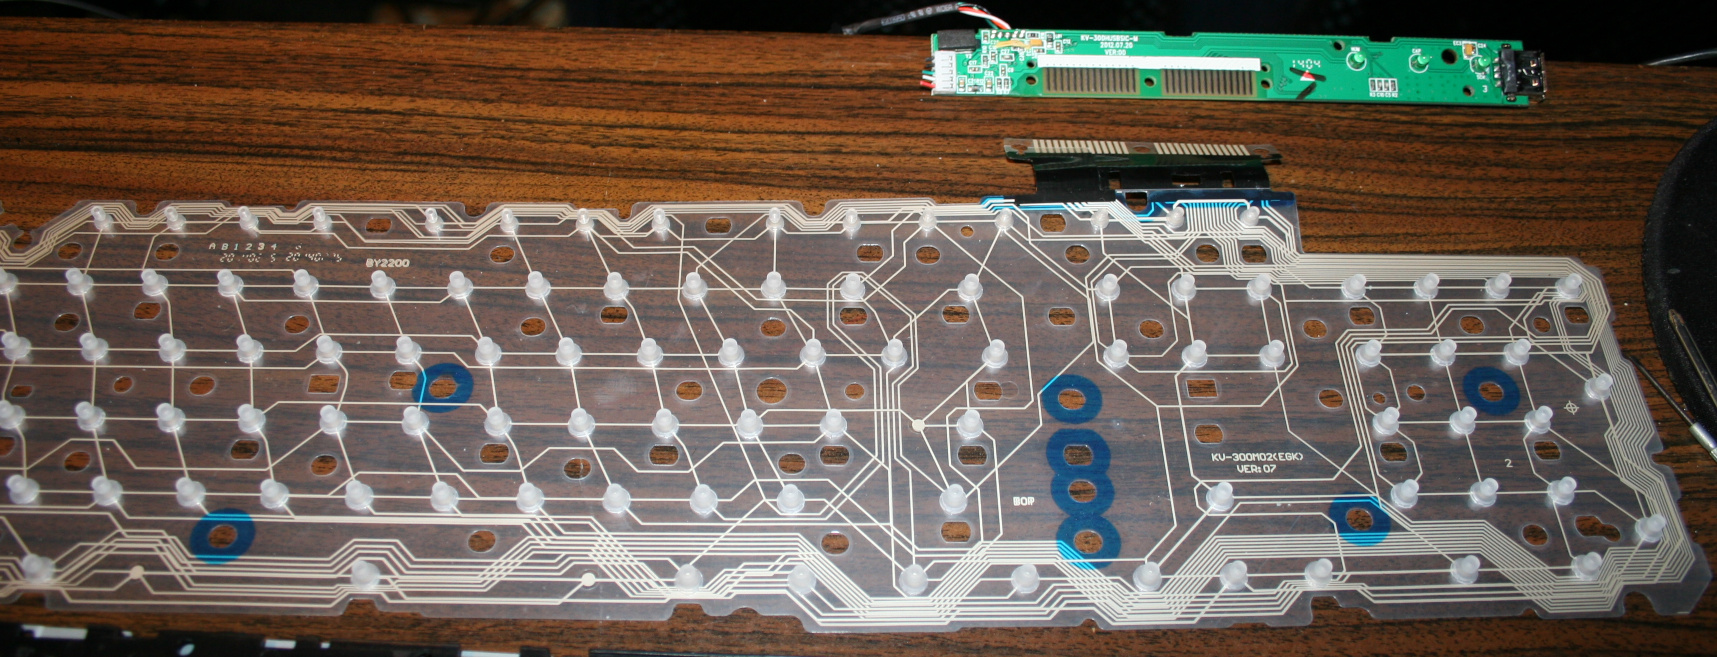
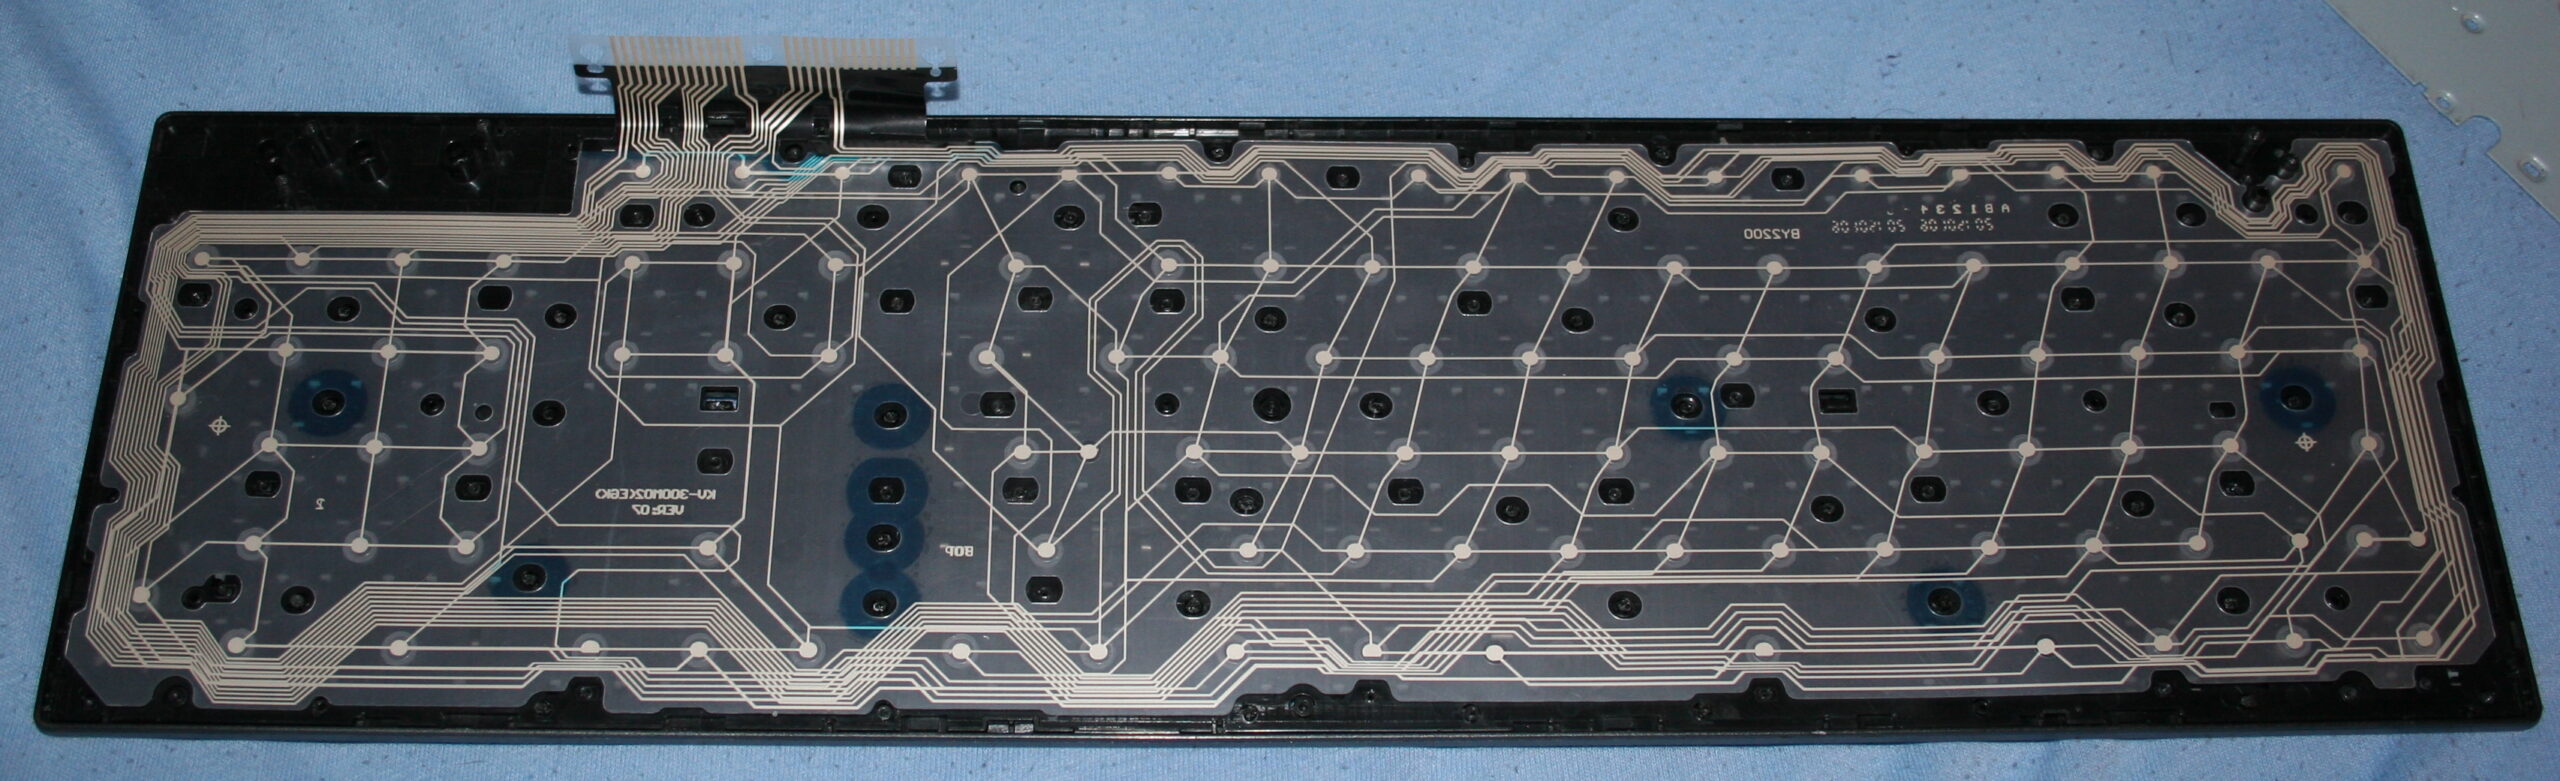
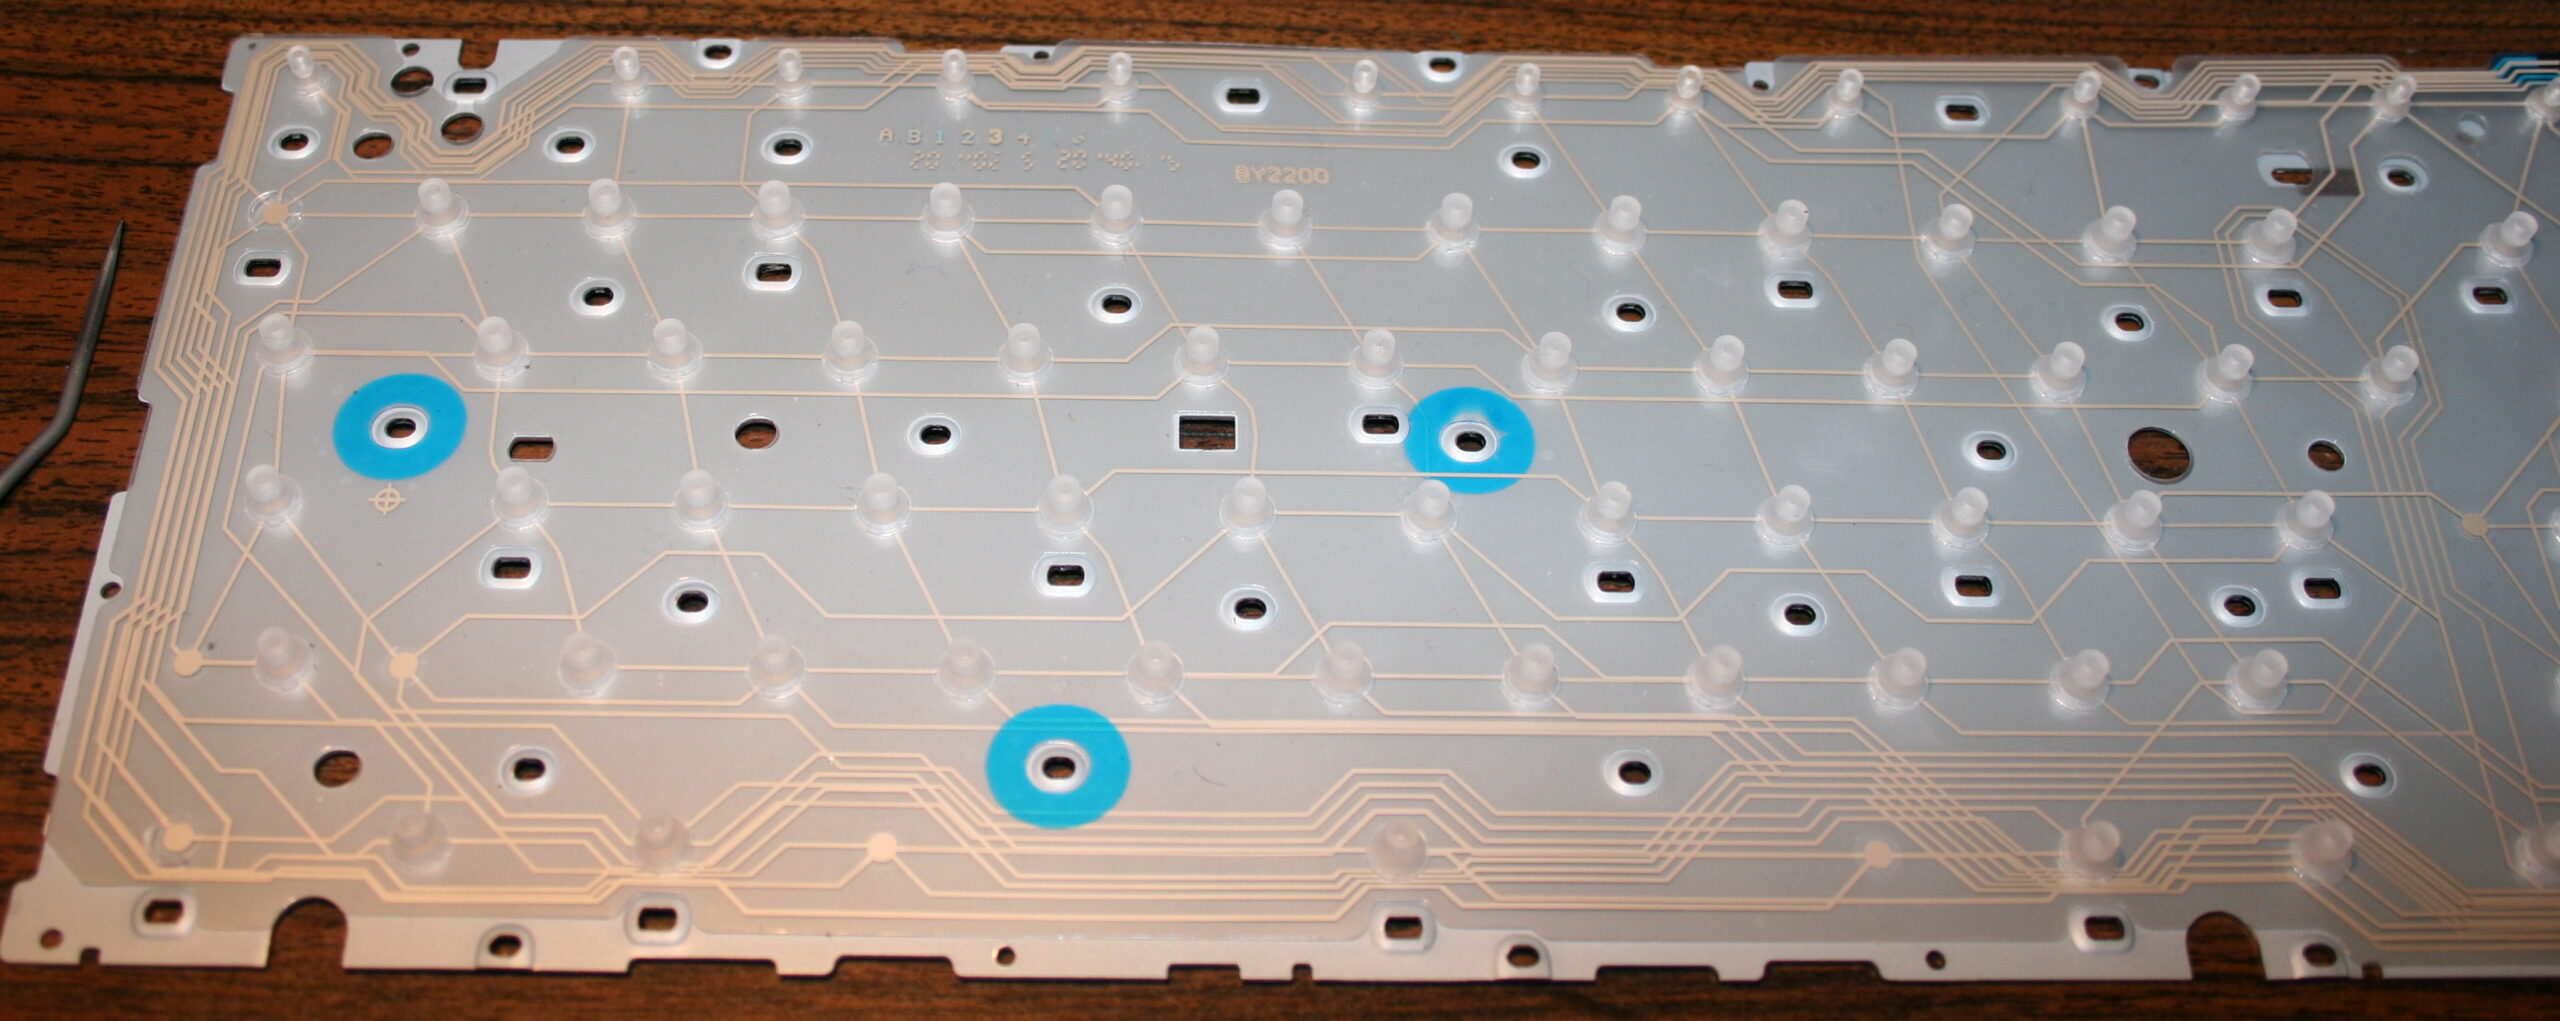
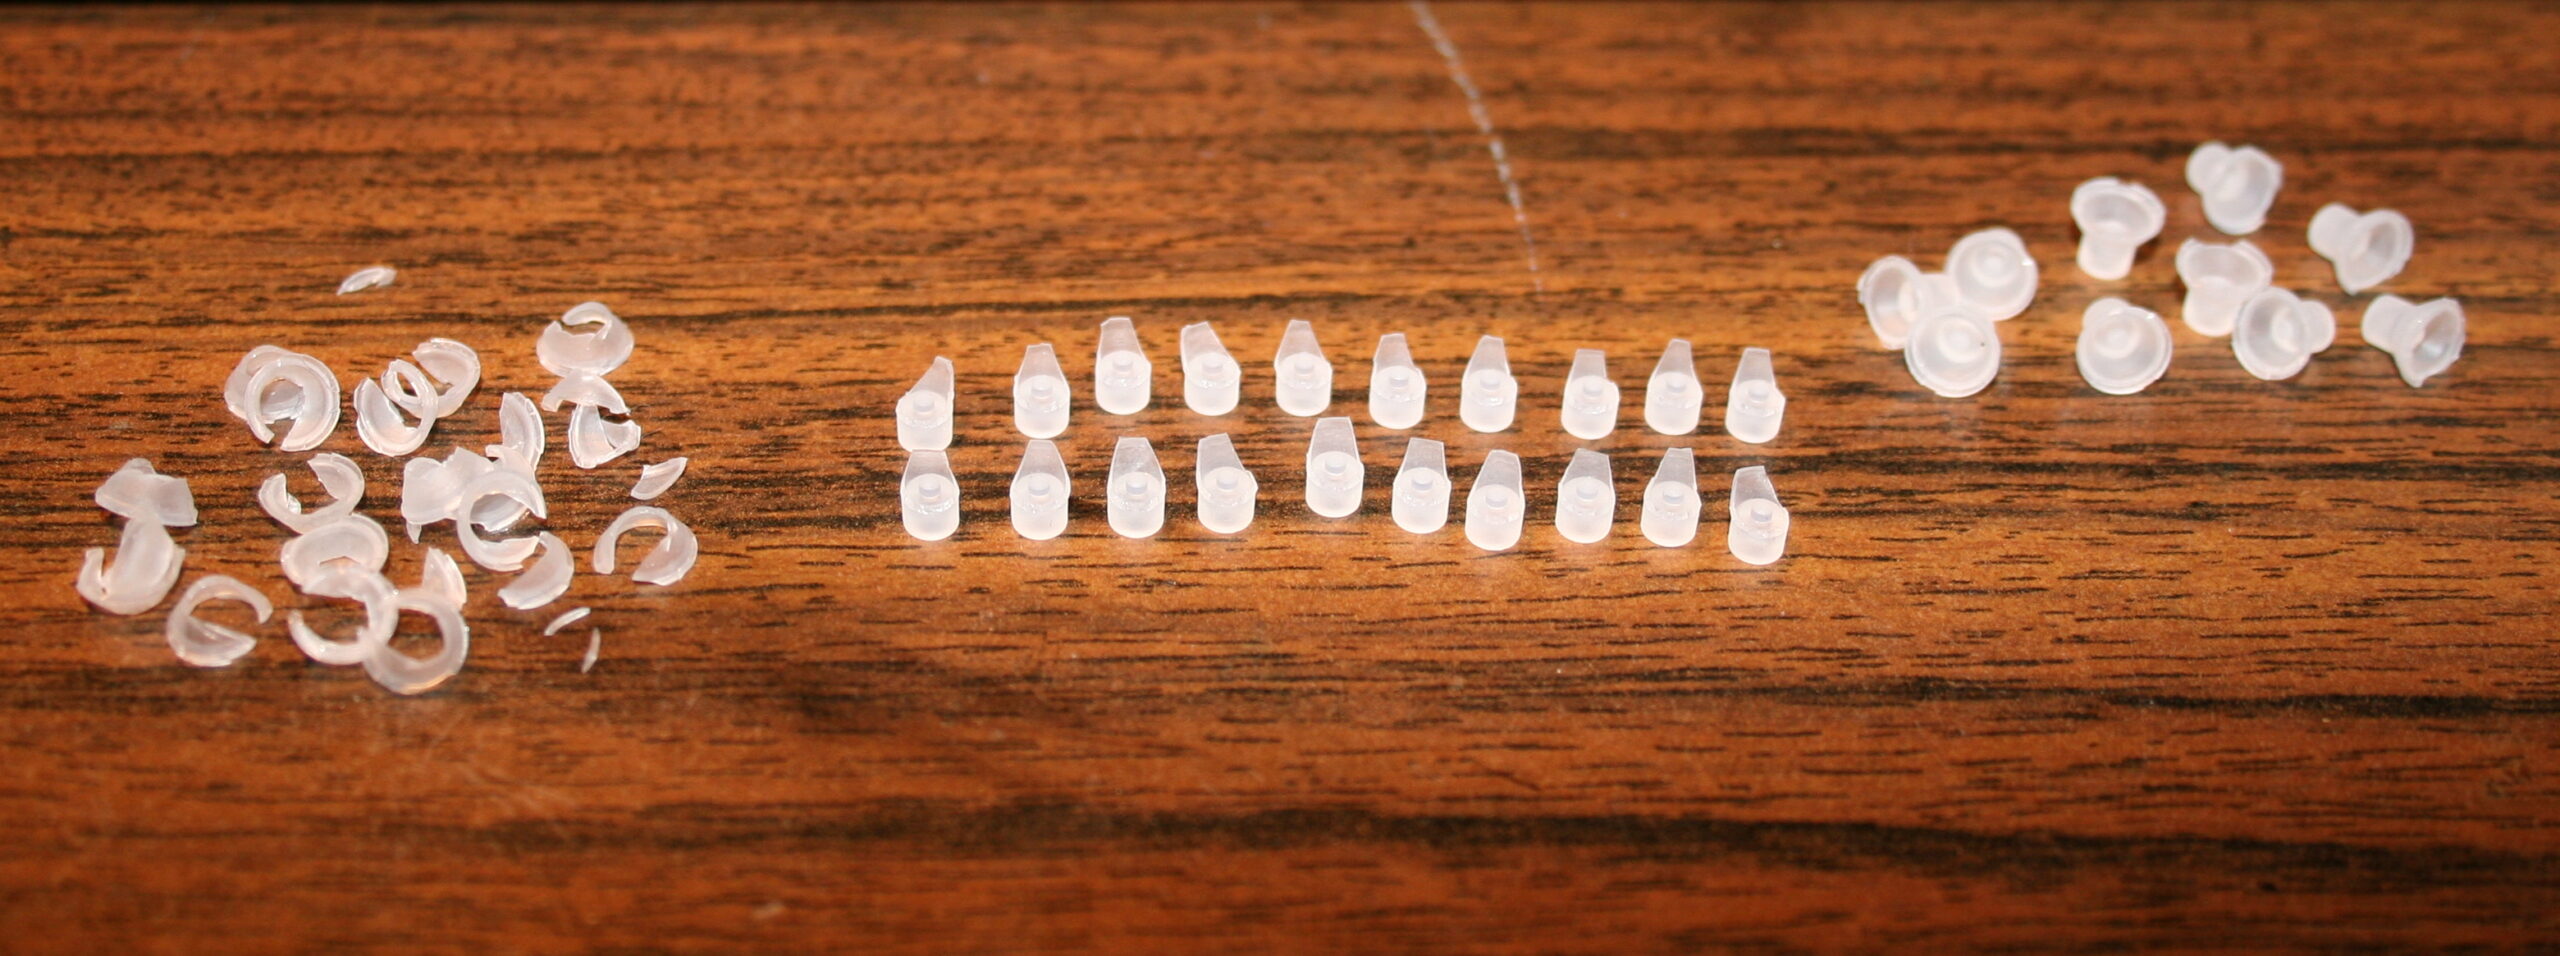
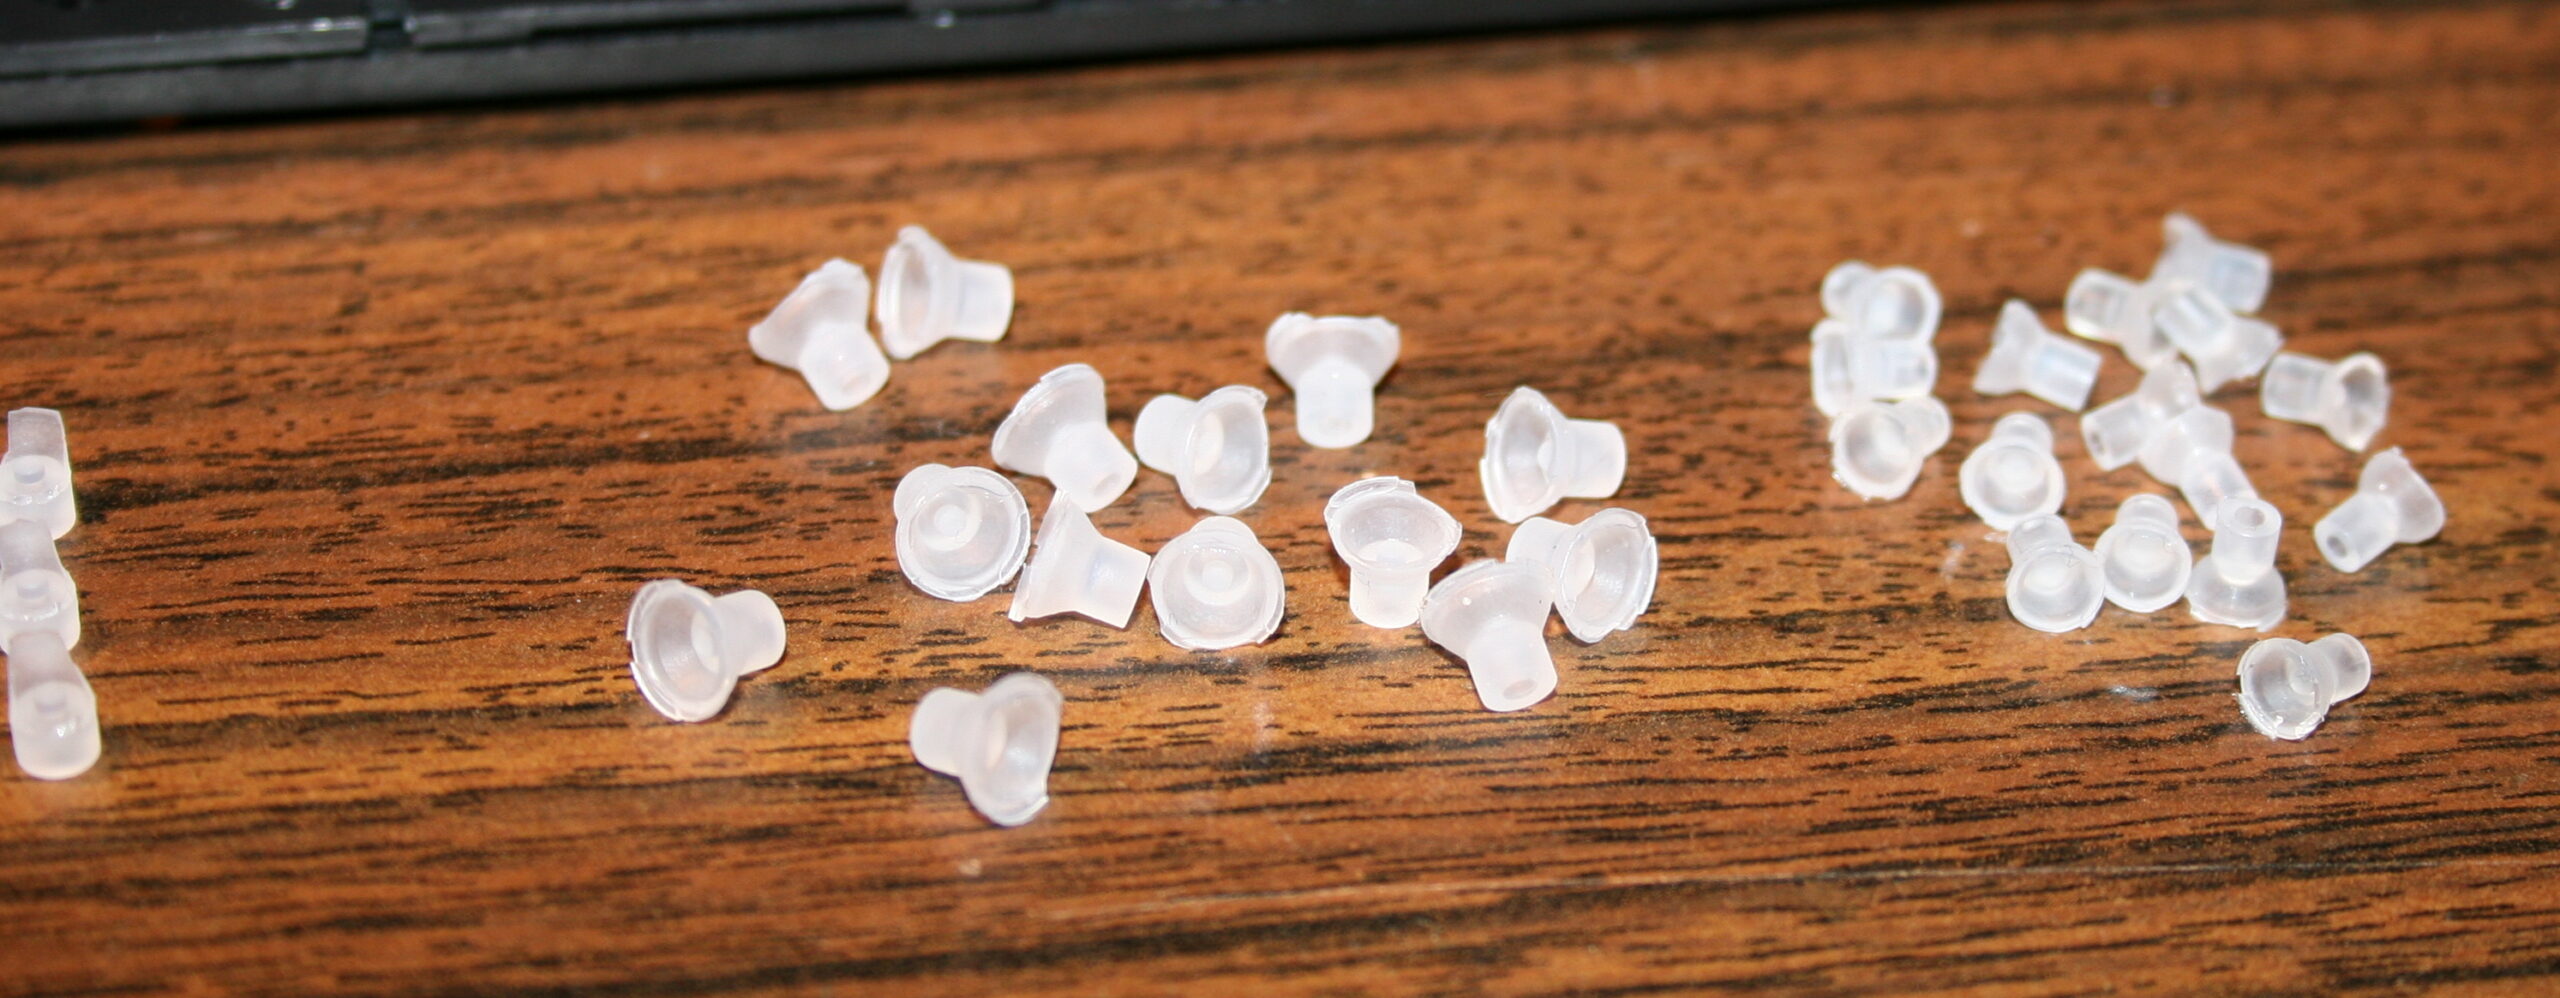
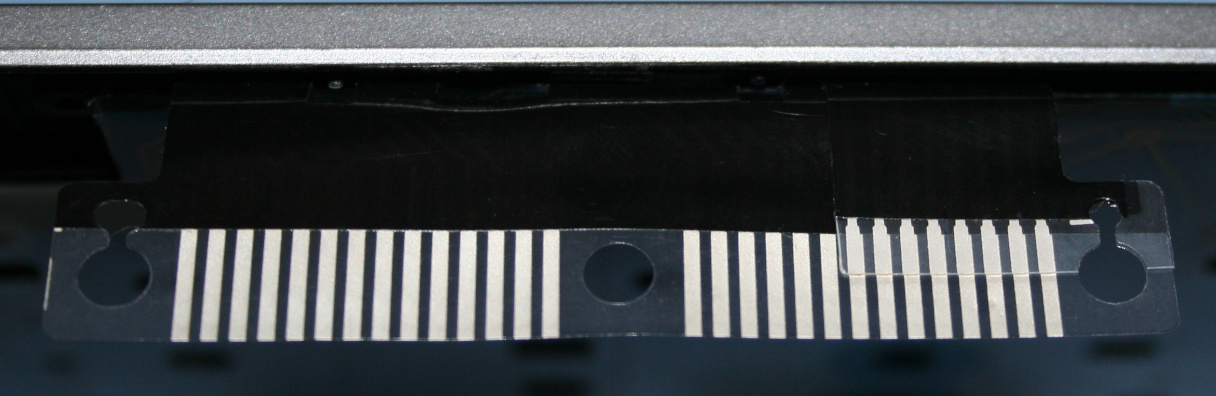
Originally most keyboards need about 50 gram force to press keys, and probably 4 mm distance. After cutting, the distance is about 1-2mm, the force gets lower (and depends more on keyboard foil), e.g. 9 to 18 gram for CK5 (but 23 g for CK3, 33 g for CK4 etc). This can also be varied per key (more detail can be seen on pictures (galleries below), but ultimately the lowest 9 g value comes from keyboard’s foil thickness (and those 23 and 33 g values are higher because the foil was thicker in those keyboards).
🛠️Modifications
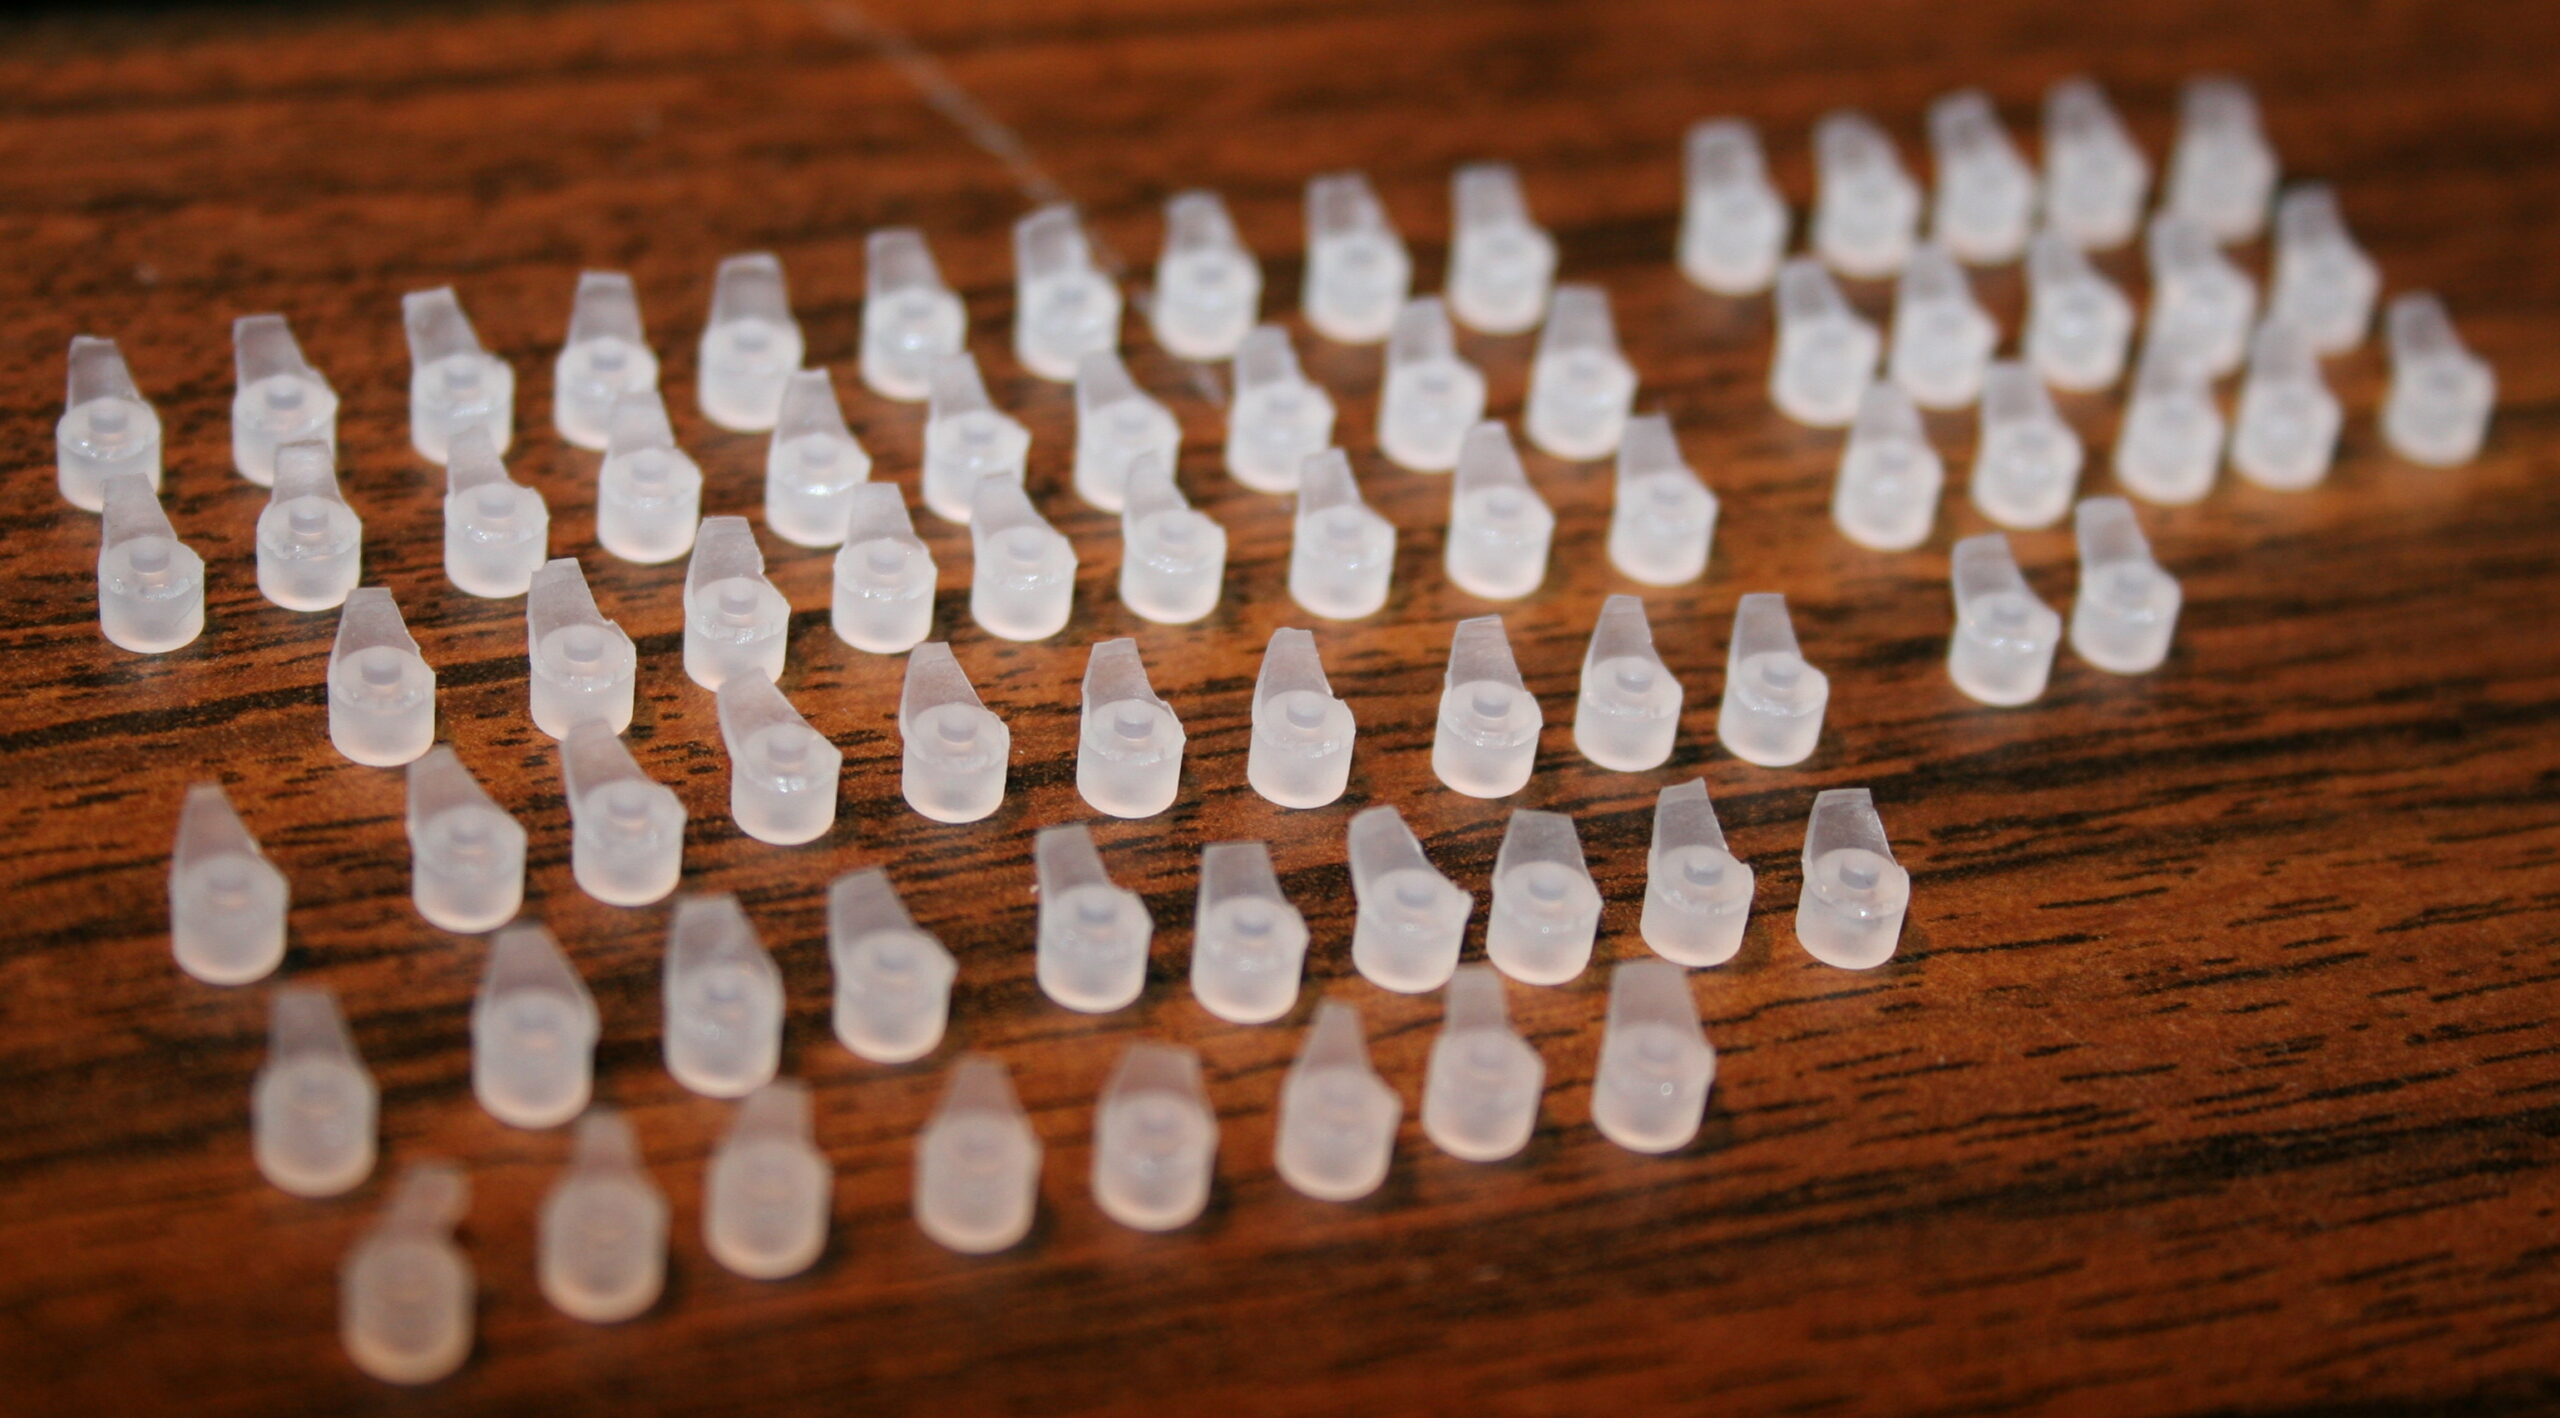
The first operation I do, is cutting off most of all rubber domes. I aim at minimized key pressing (actuation) force and also travel distance.
This makes the keys much softer to press. If pressing needs less effort then it will cause less fatigue. It is simply more pleasant and comfortable. Also healthier, since the risk of keyboard injuries decreases.
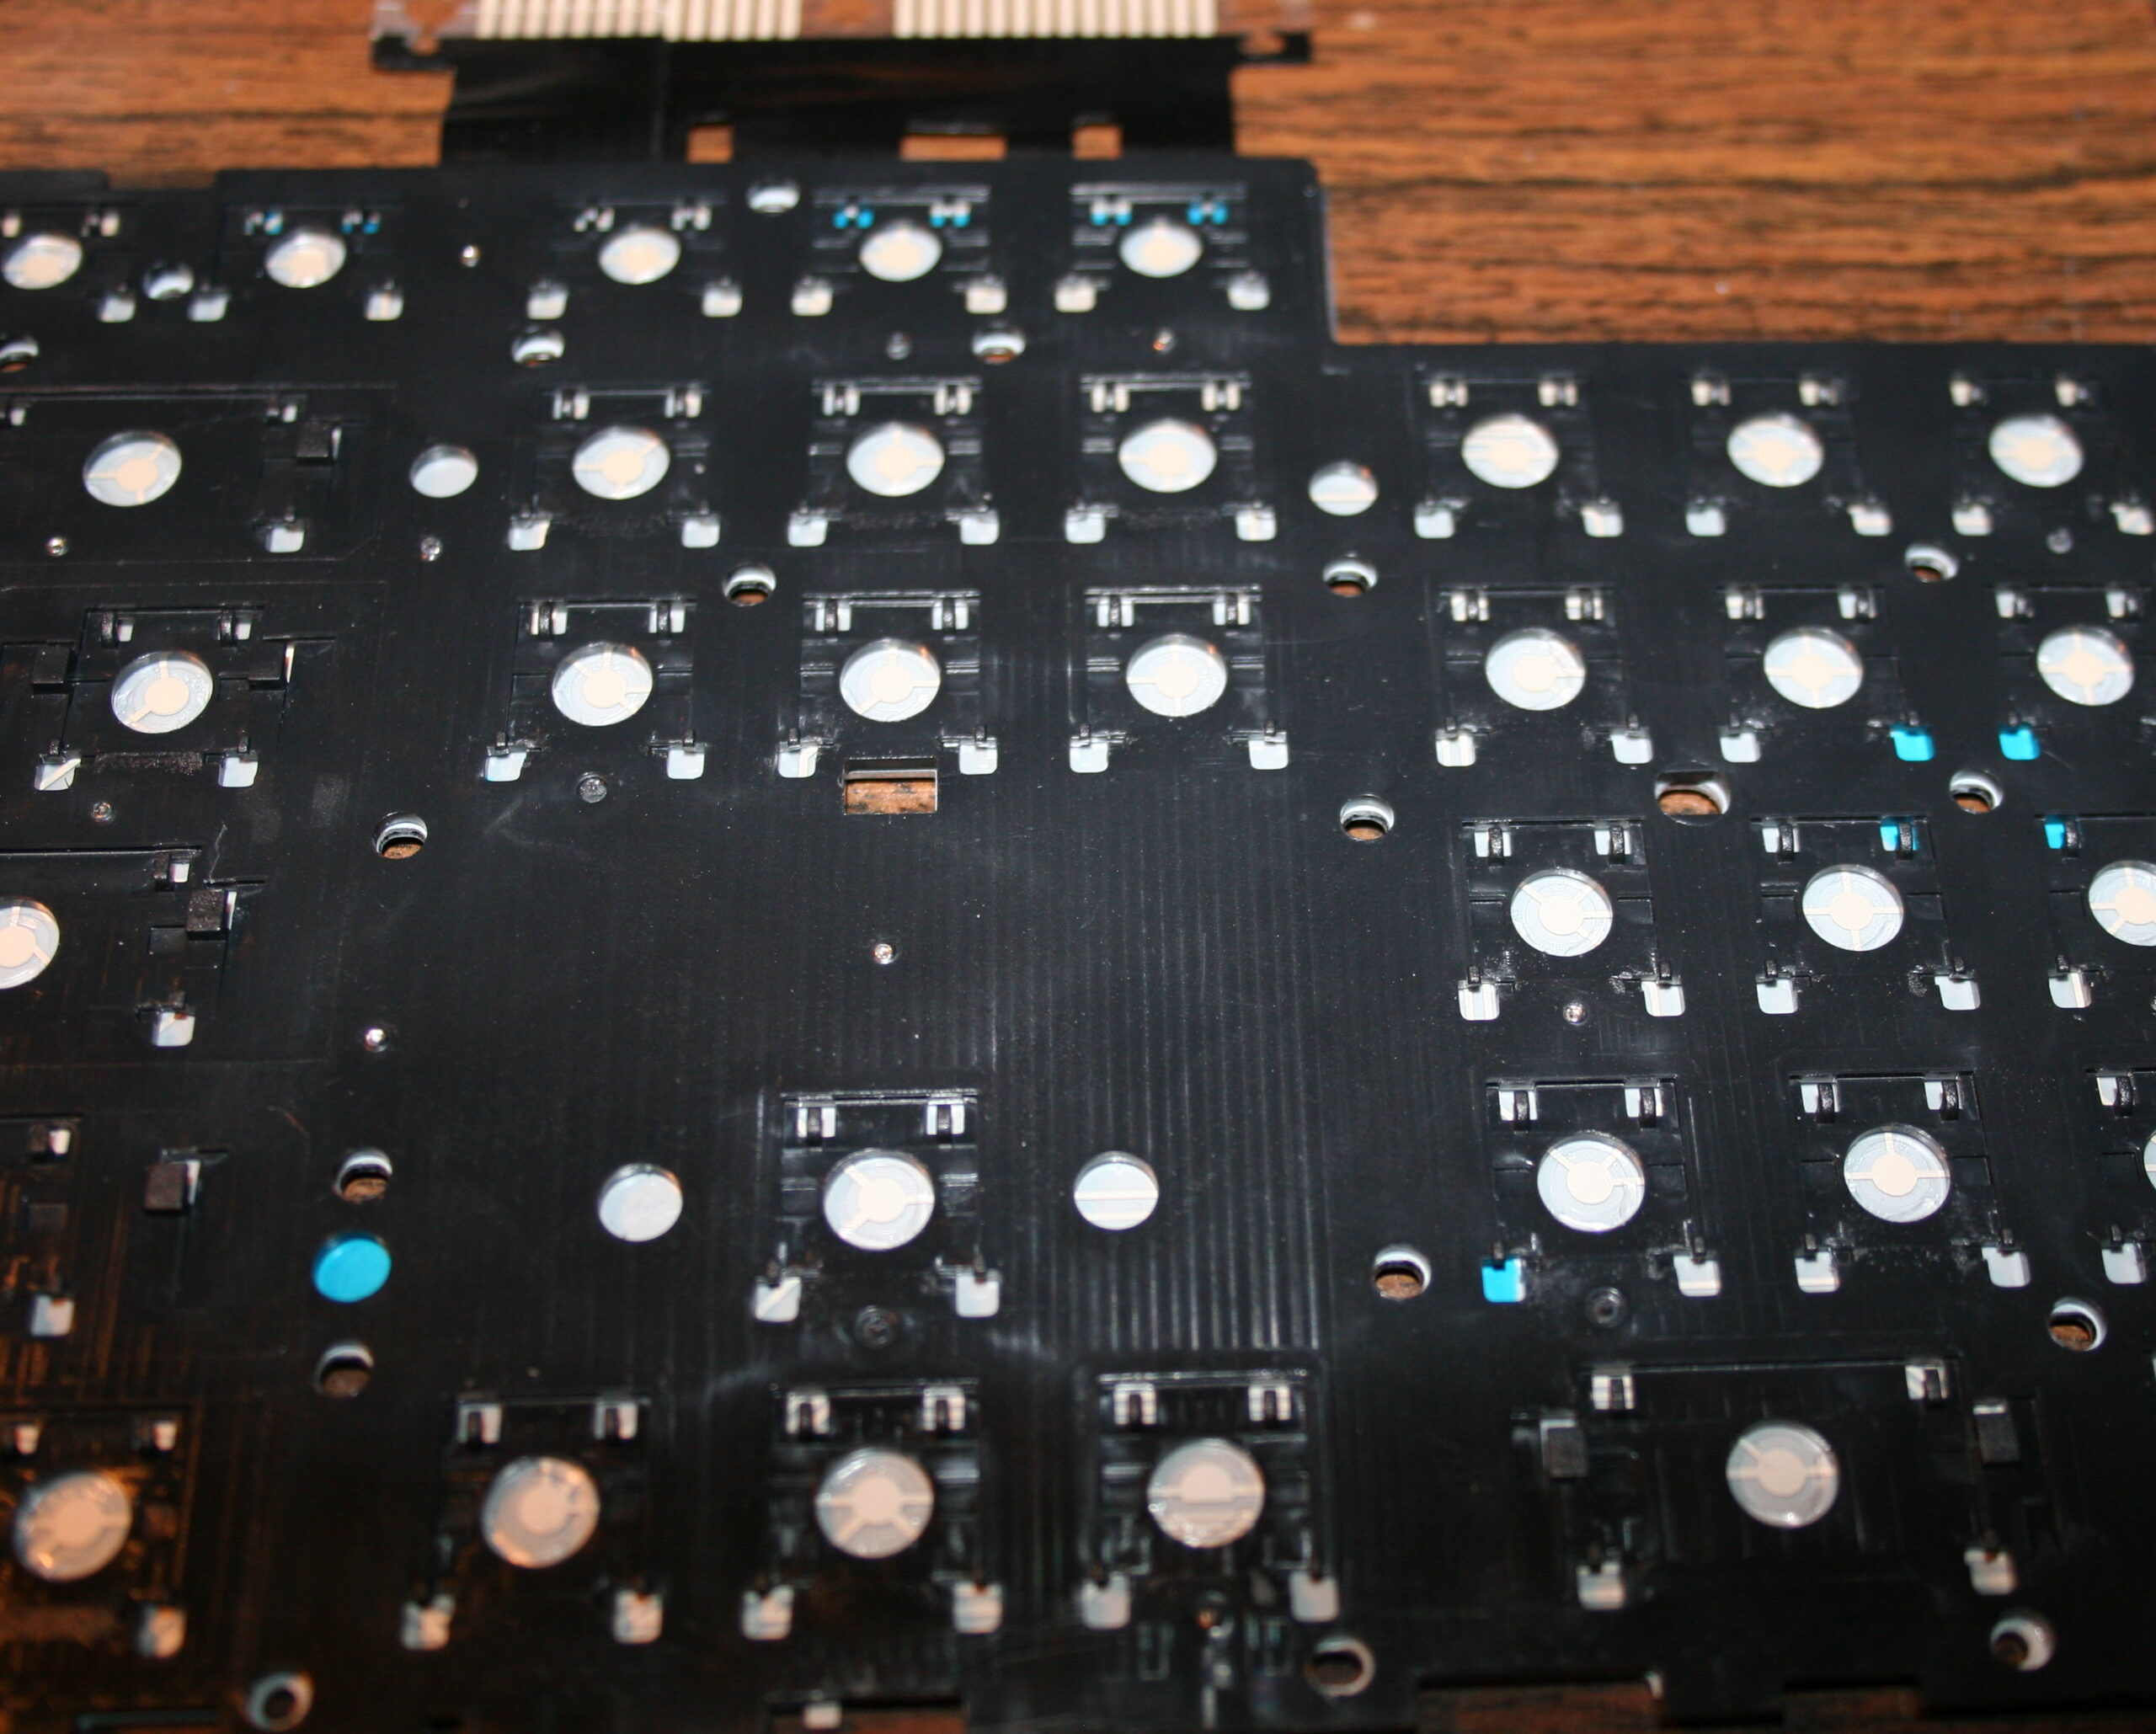
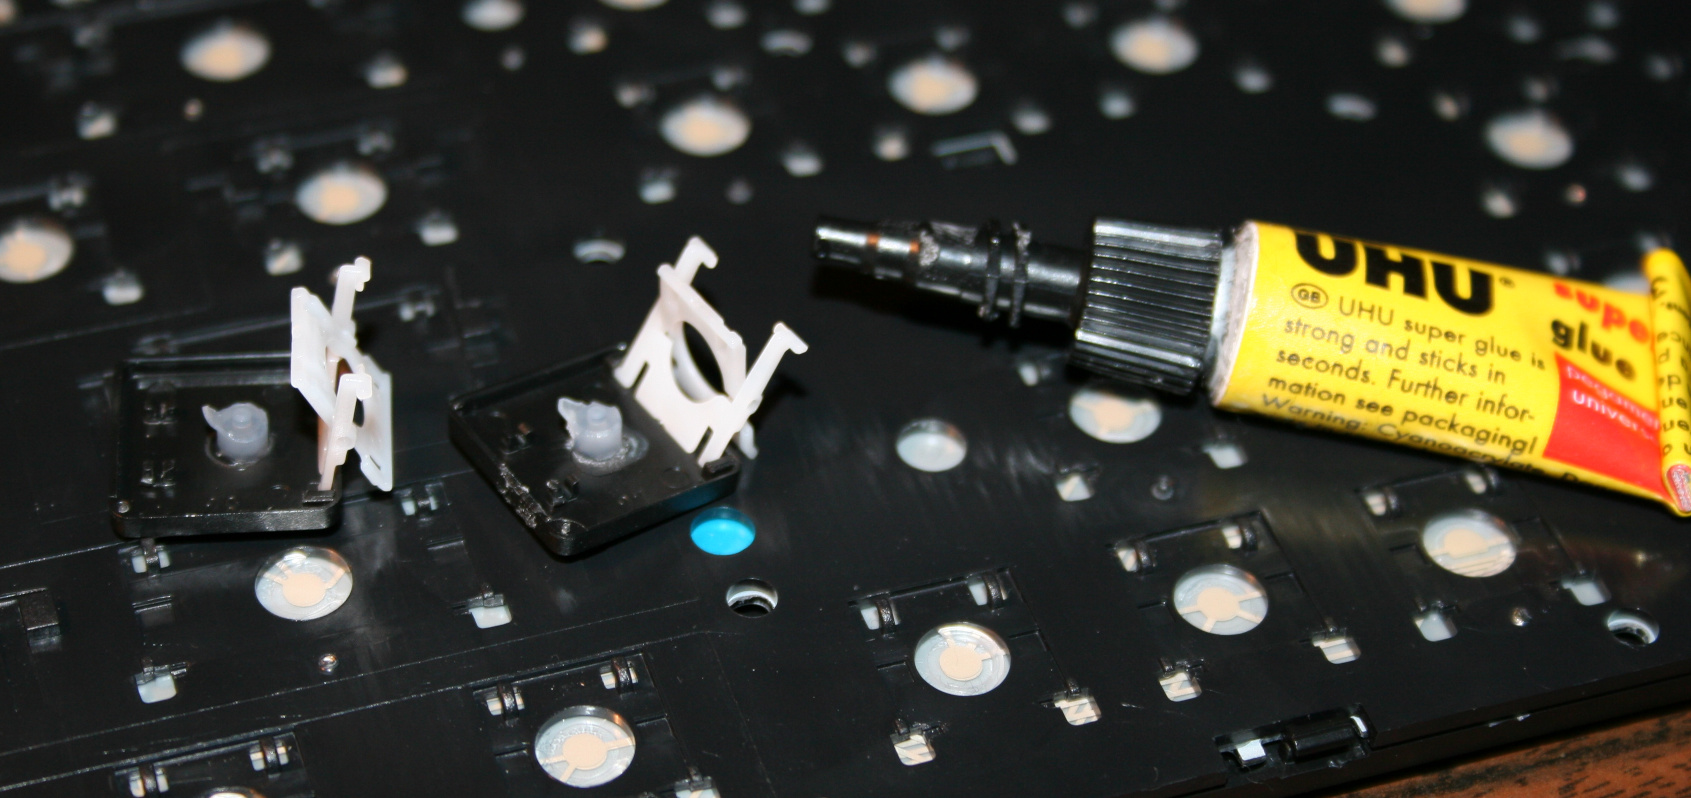
The second is glueing them back to keys. It’s required because they are glued to foil (mostly always).
Everytime (except once in 2020) after doing the process, I am using the keyboard myself constantly. Thus if done right, there is no risk of any key failure.
📜History
I already did this first on my two oldest keyboards in 2005 and 2006.
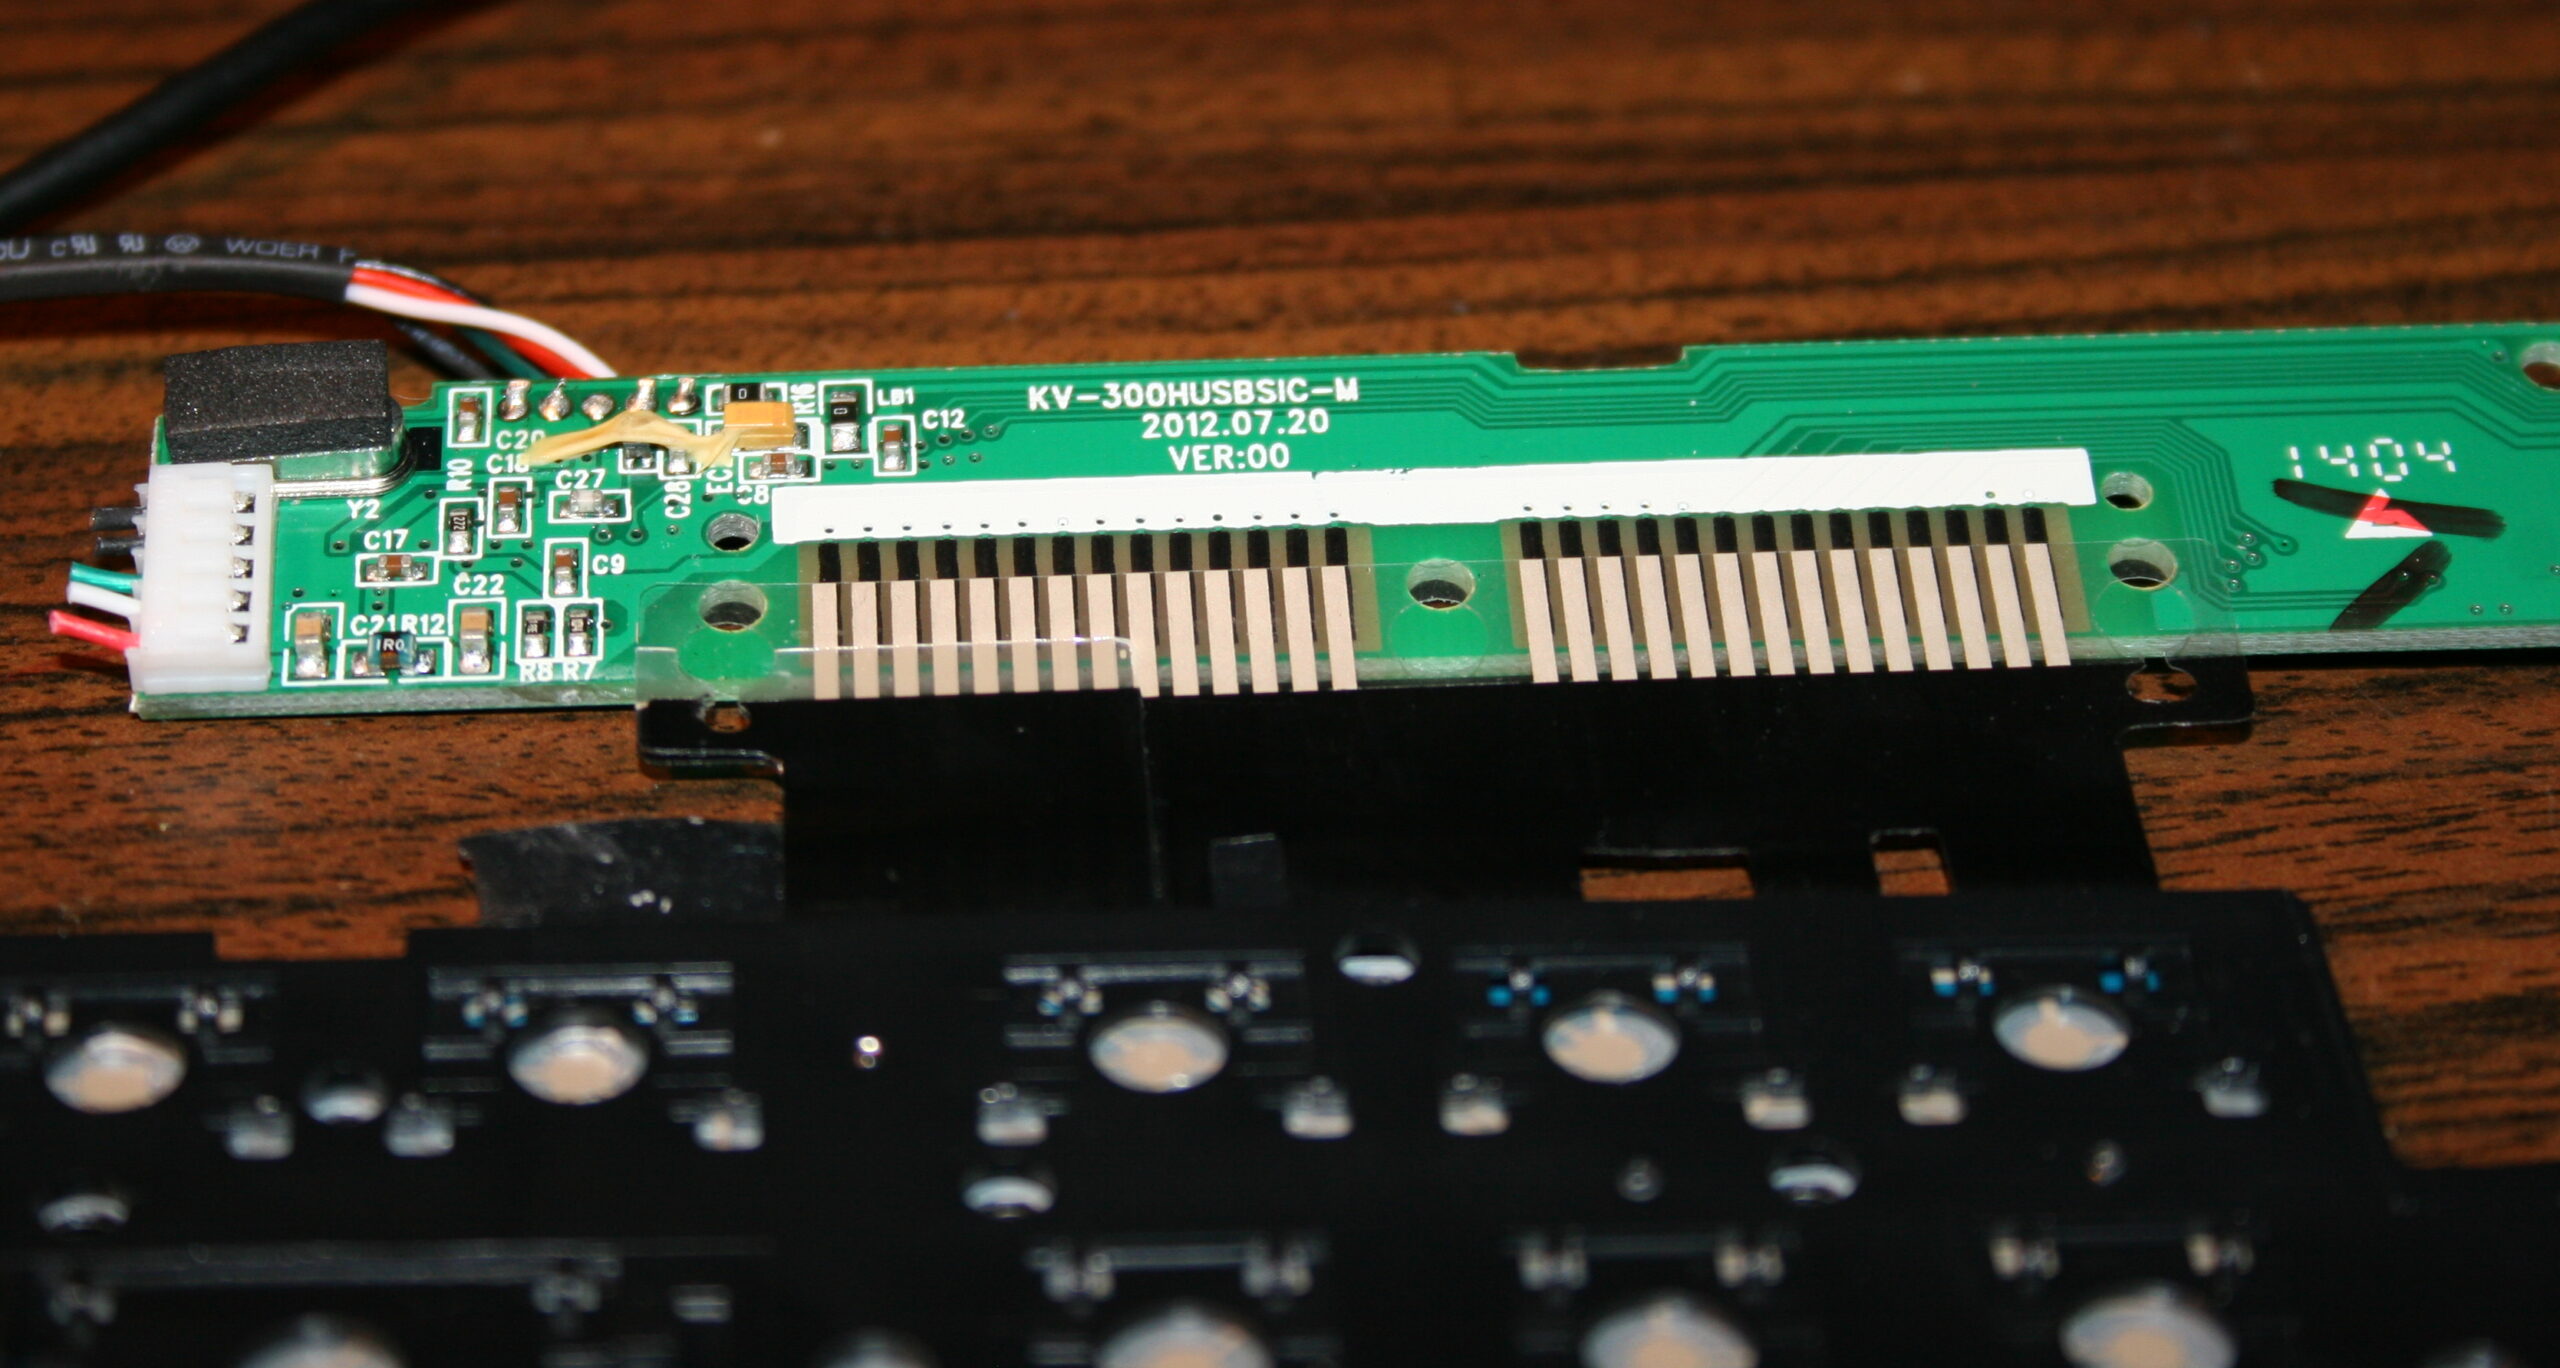
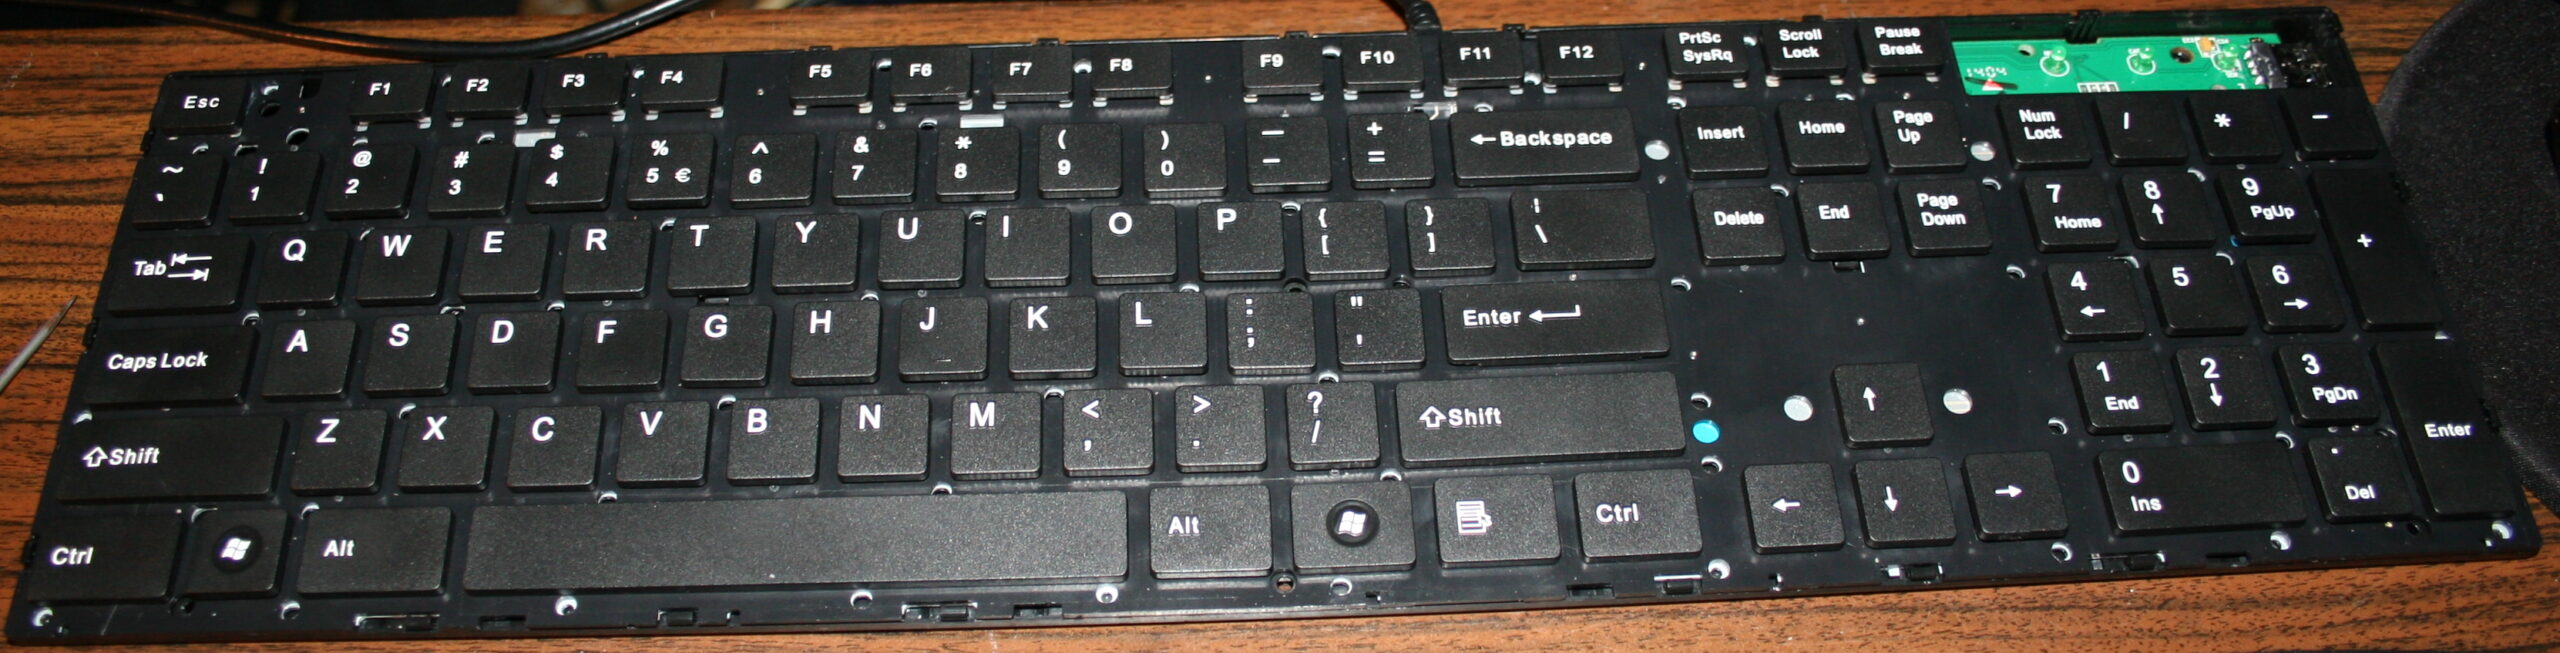
Then in 2015 for this keyboard (originally A4 Tech KV-300H) named CK5, and again later in 2020 (another same keyboard) making the process the video.
Next for CK3 and CK4 in 2016, which later became CK6 and CK7, and CK6 became CK9 with KC4 in 2020.
▶️Videos
Video guide showing the process here, for just a few keys.
Another video of testing force with weights after.
🪛Steps, guide
Steps needed, shown in video:
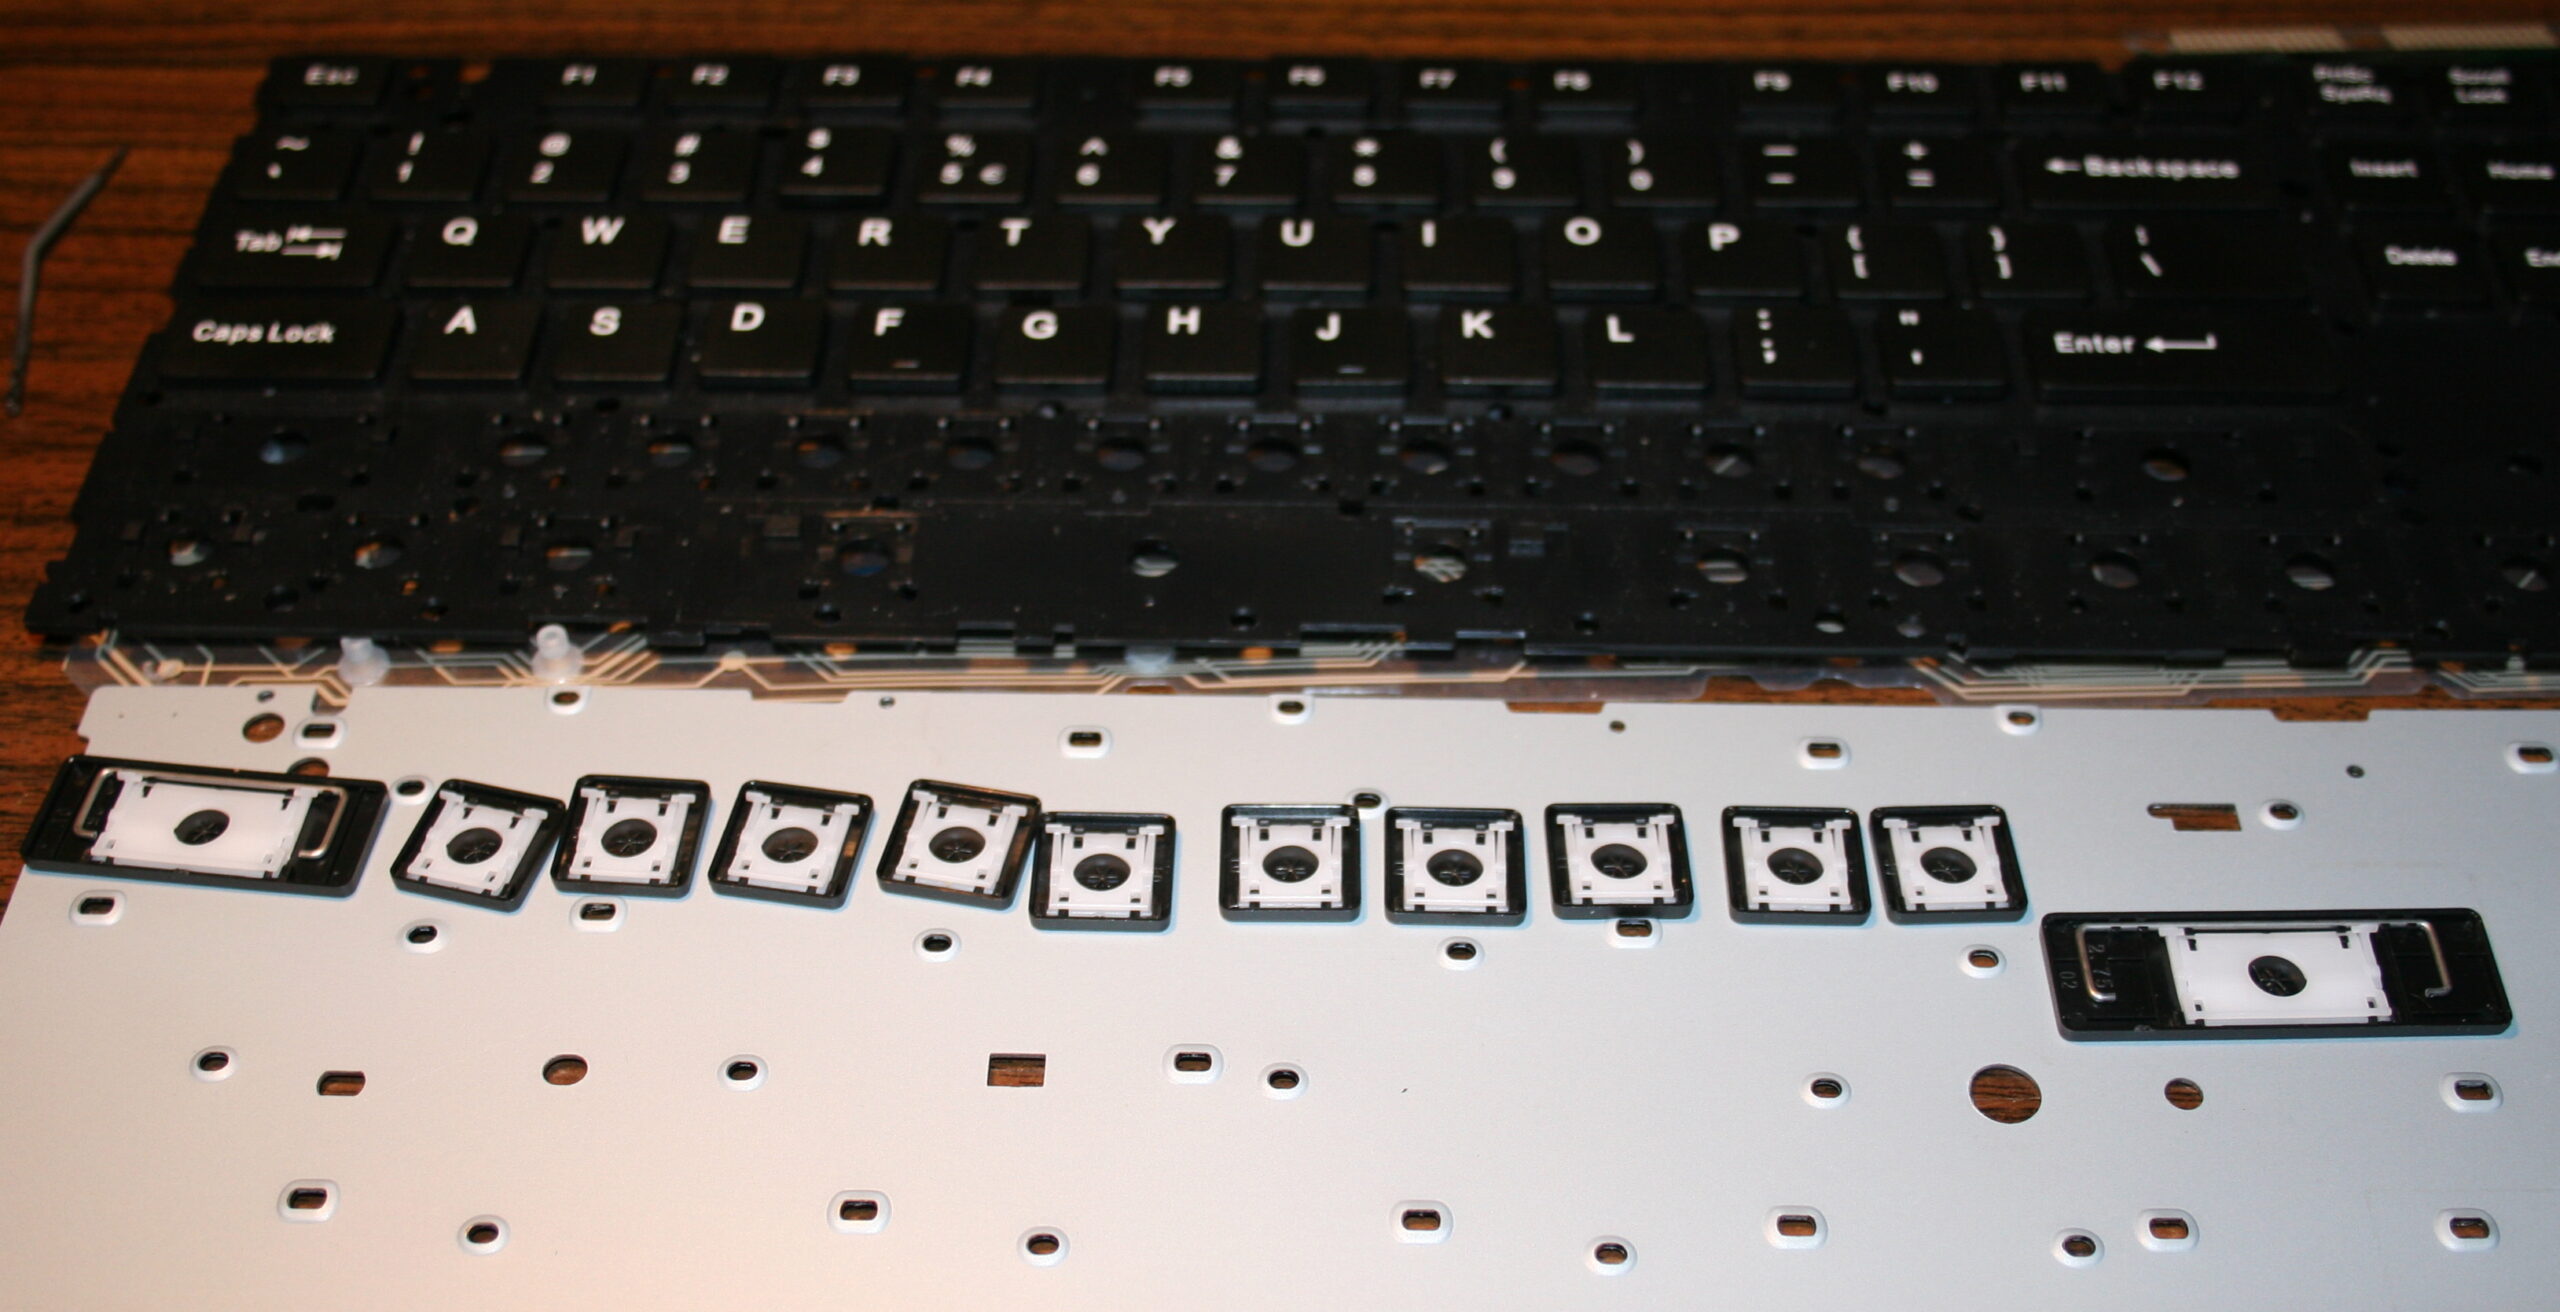
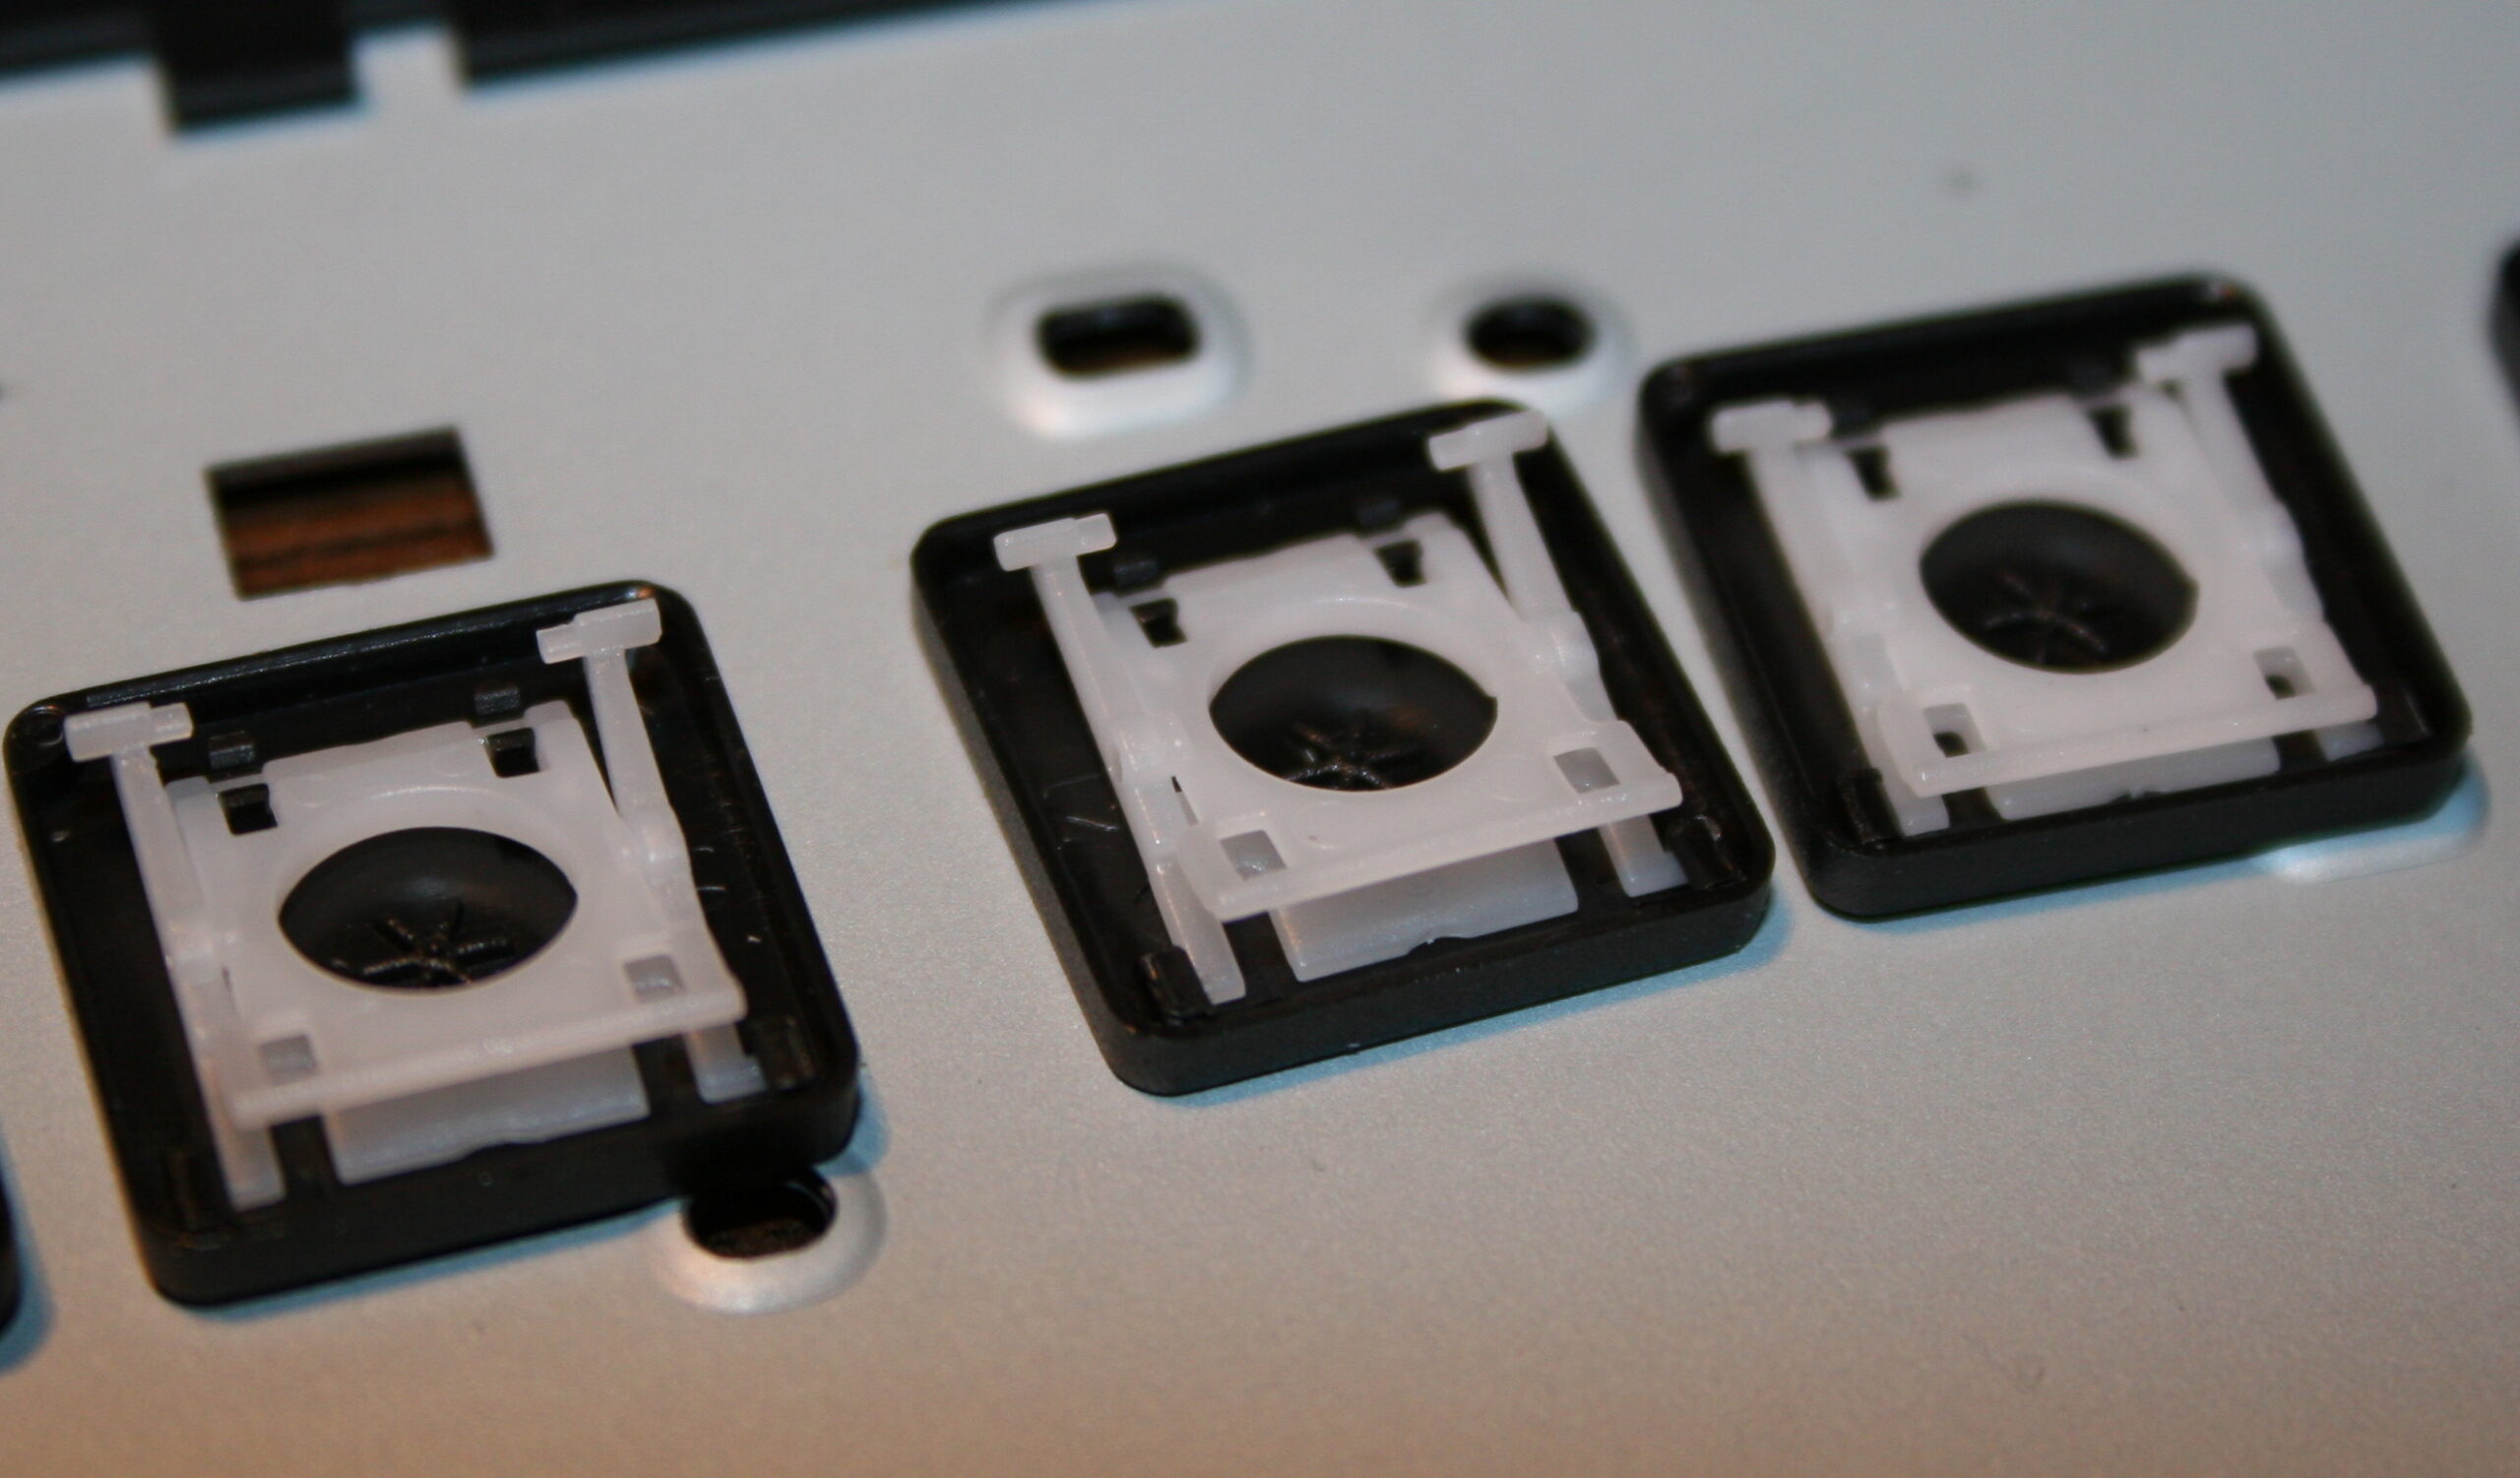
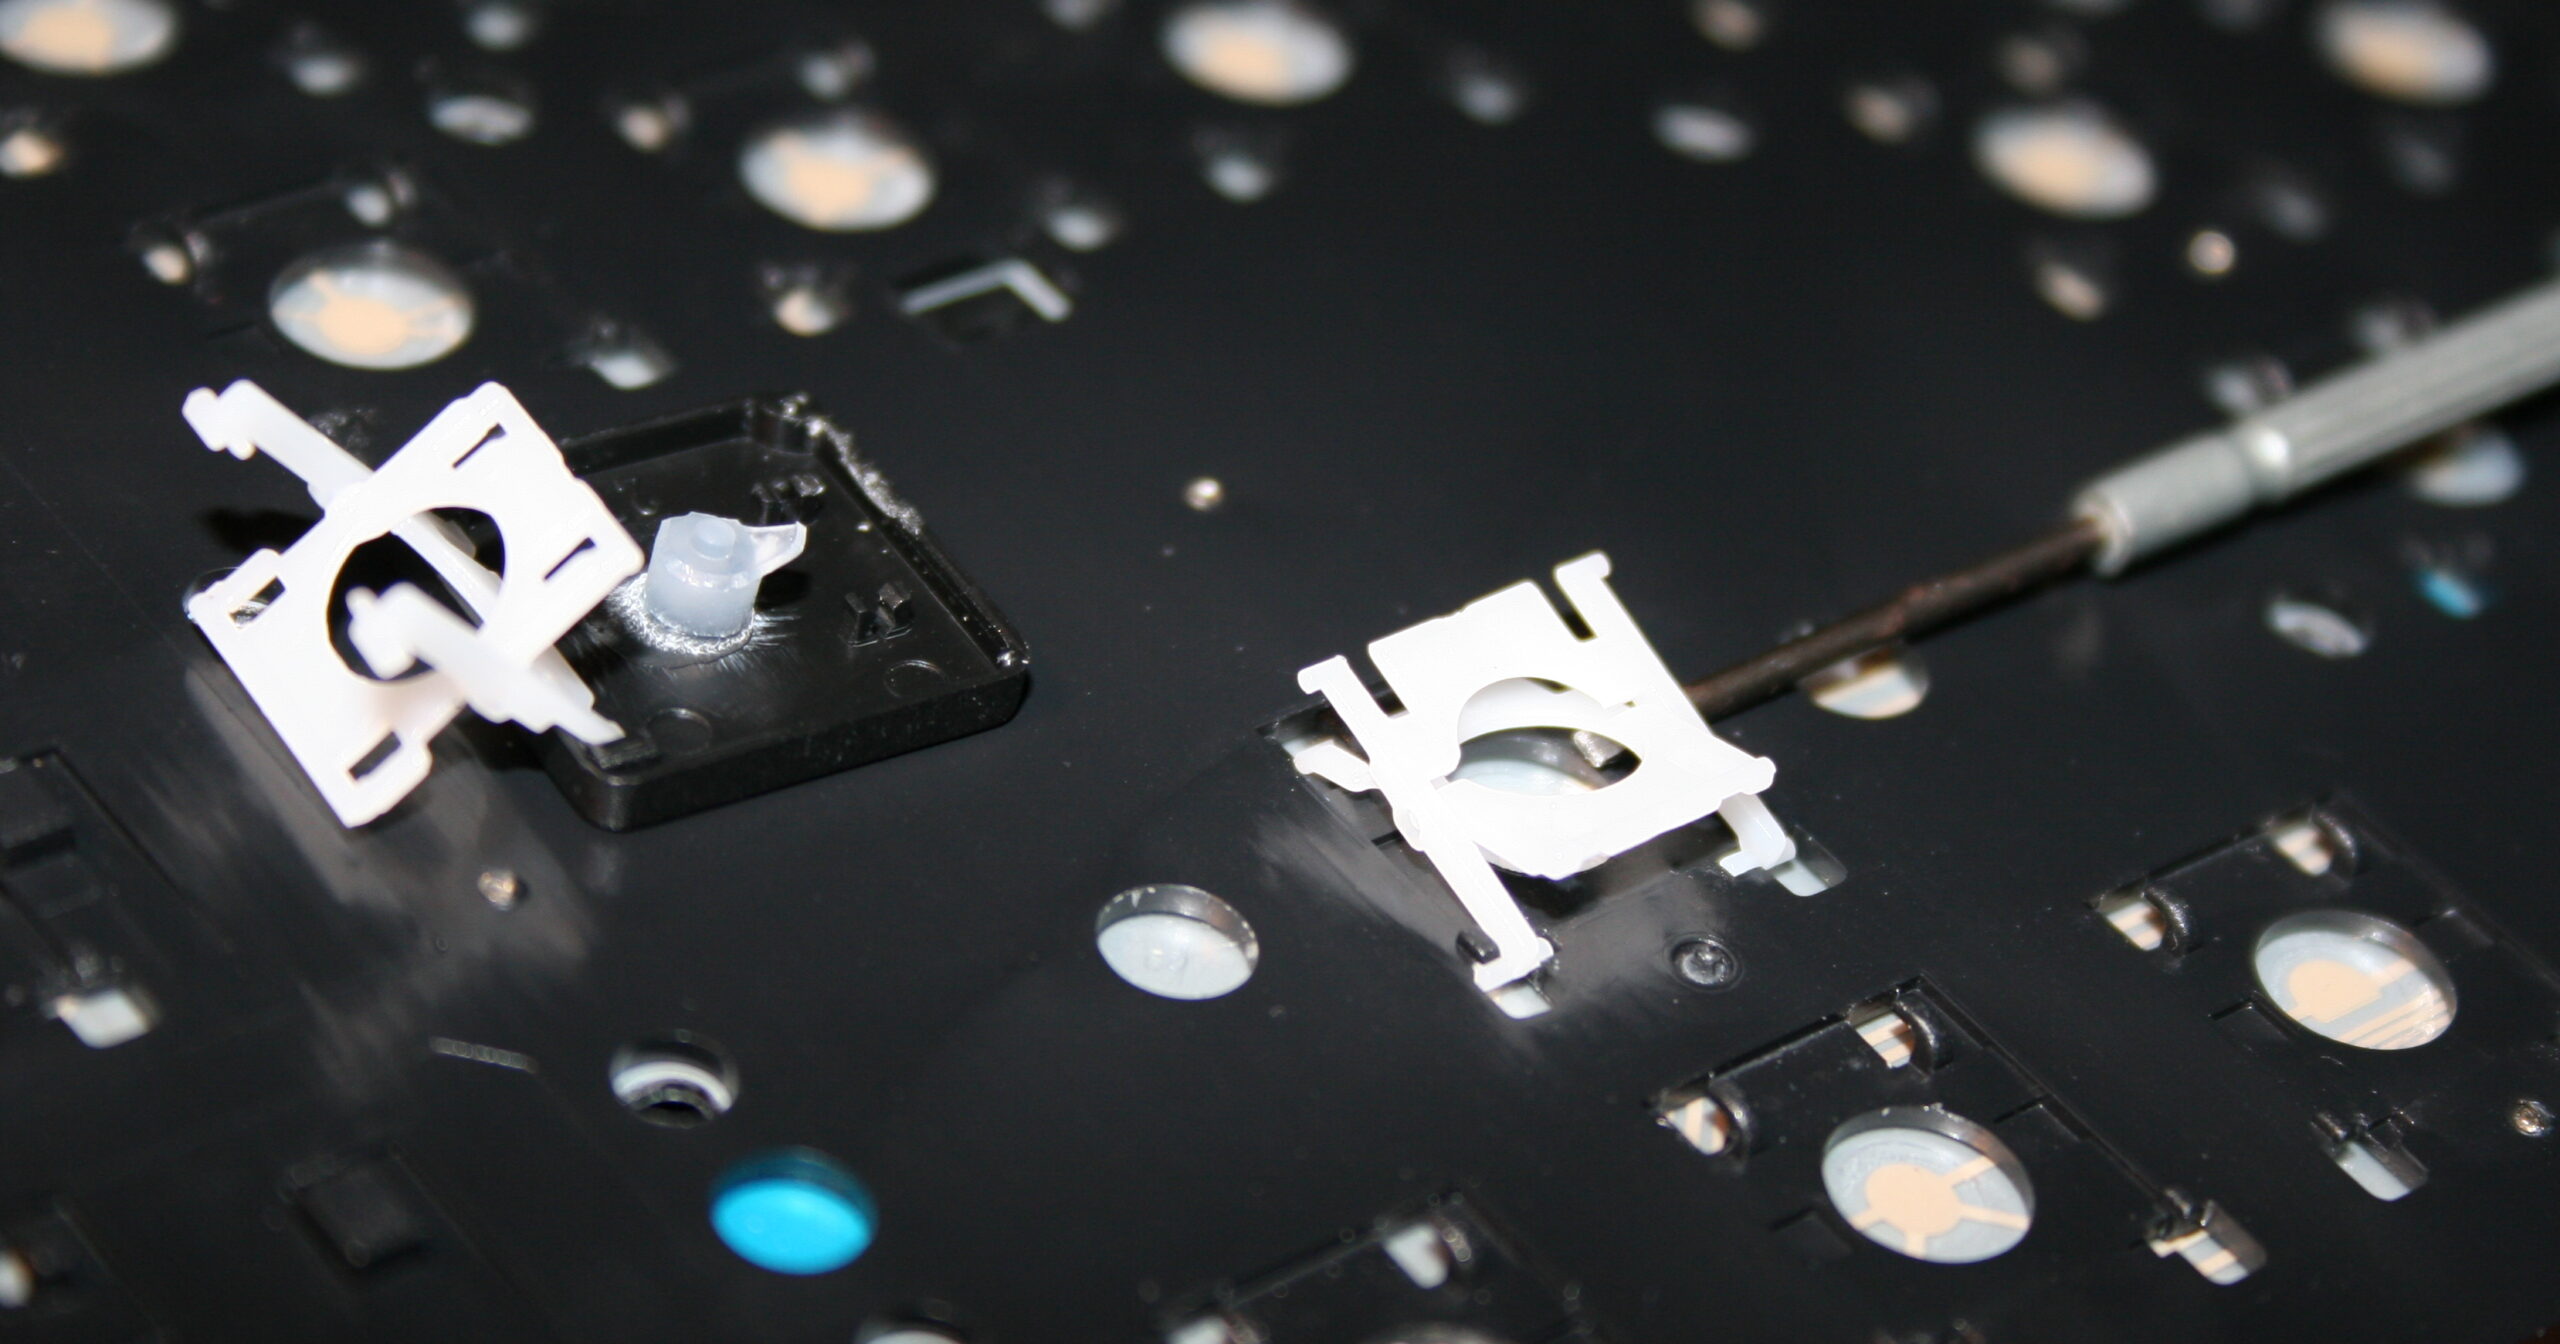
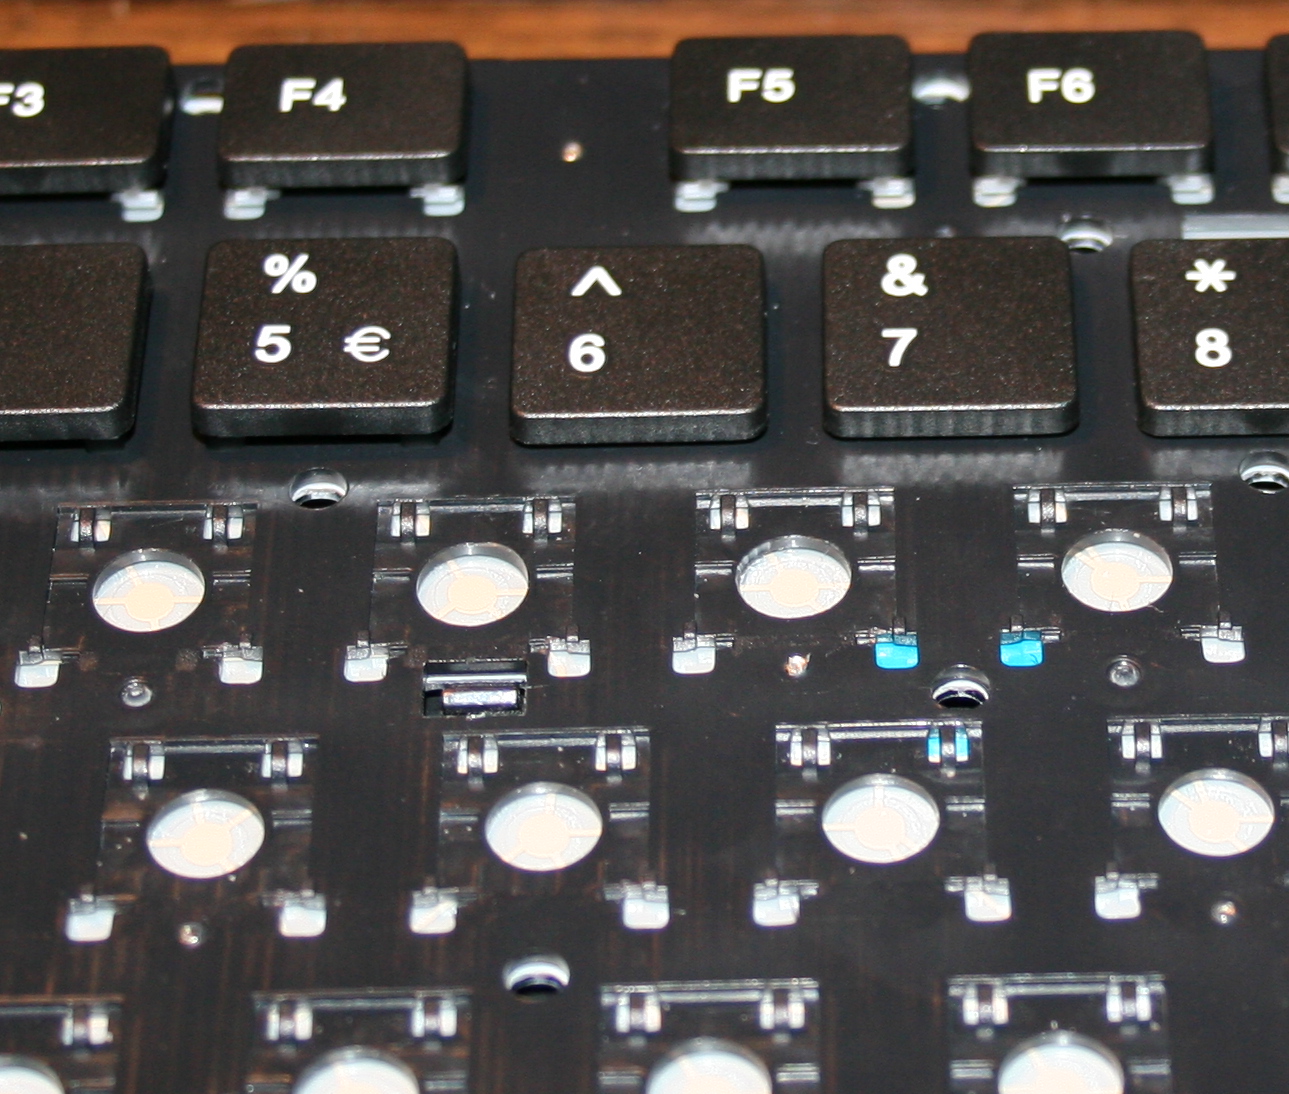
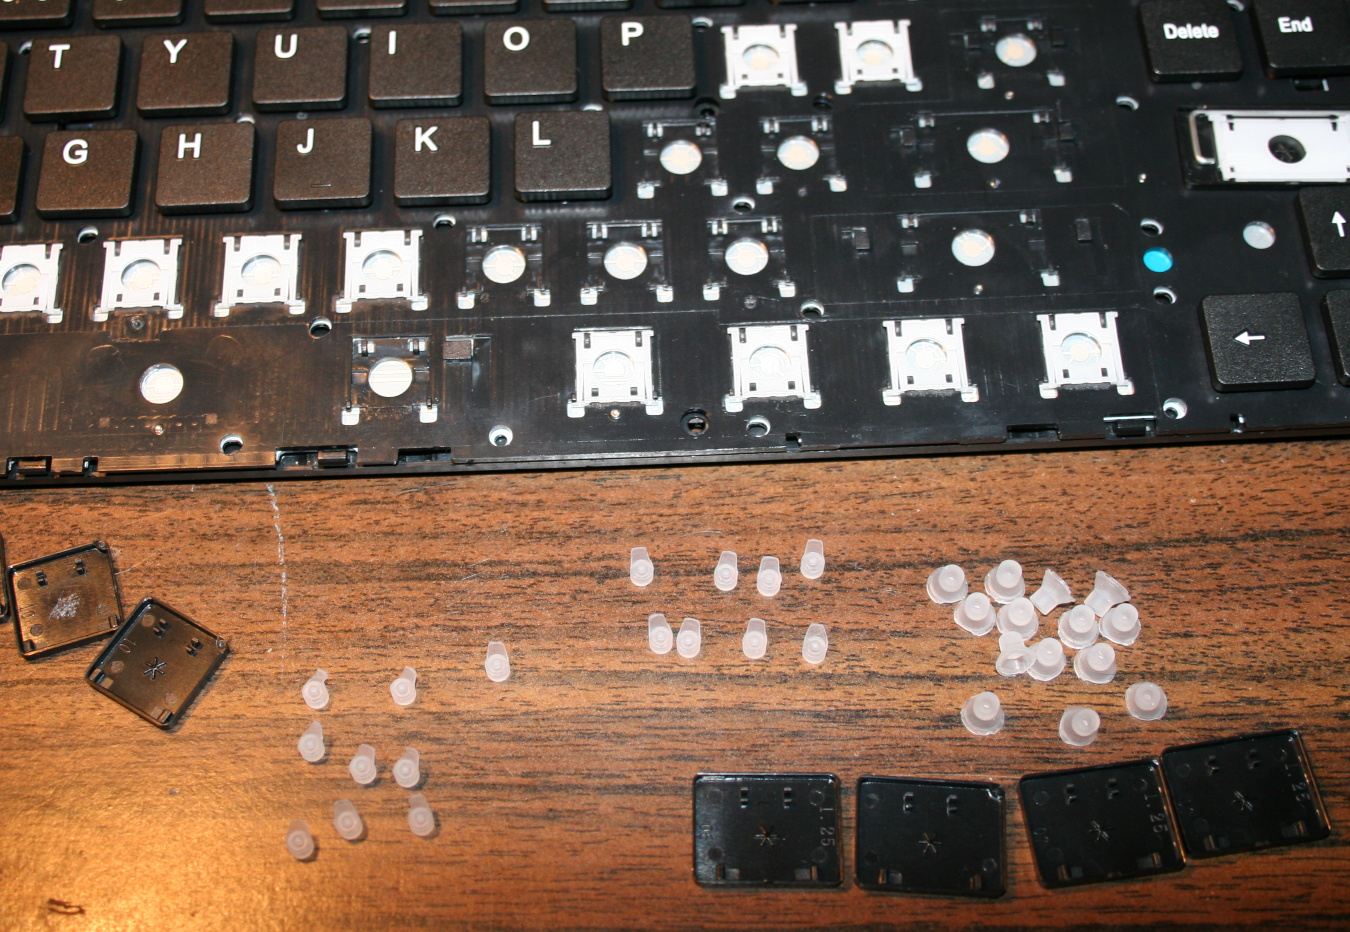
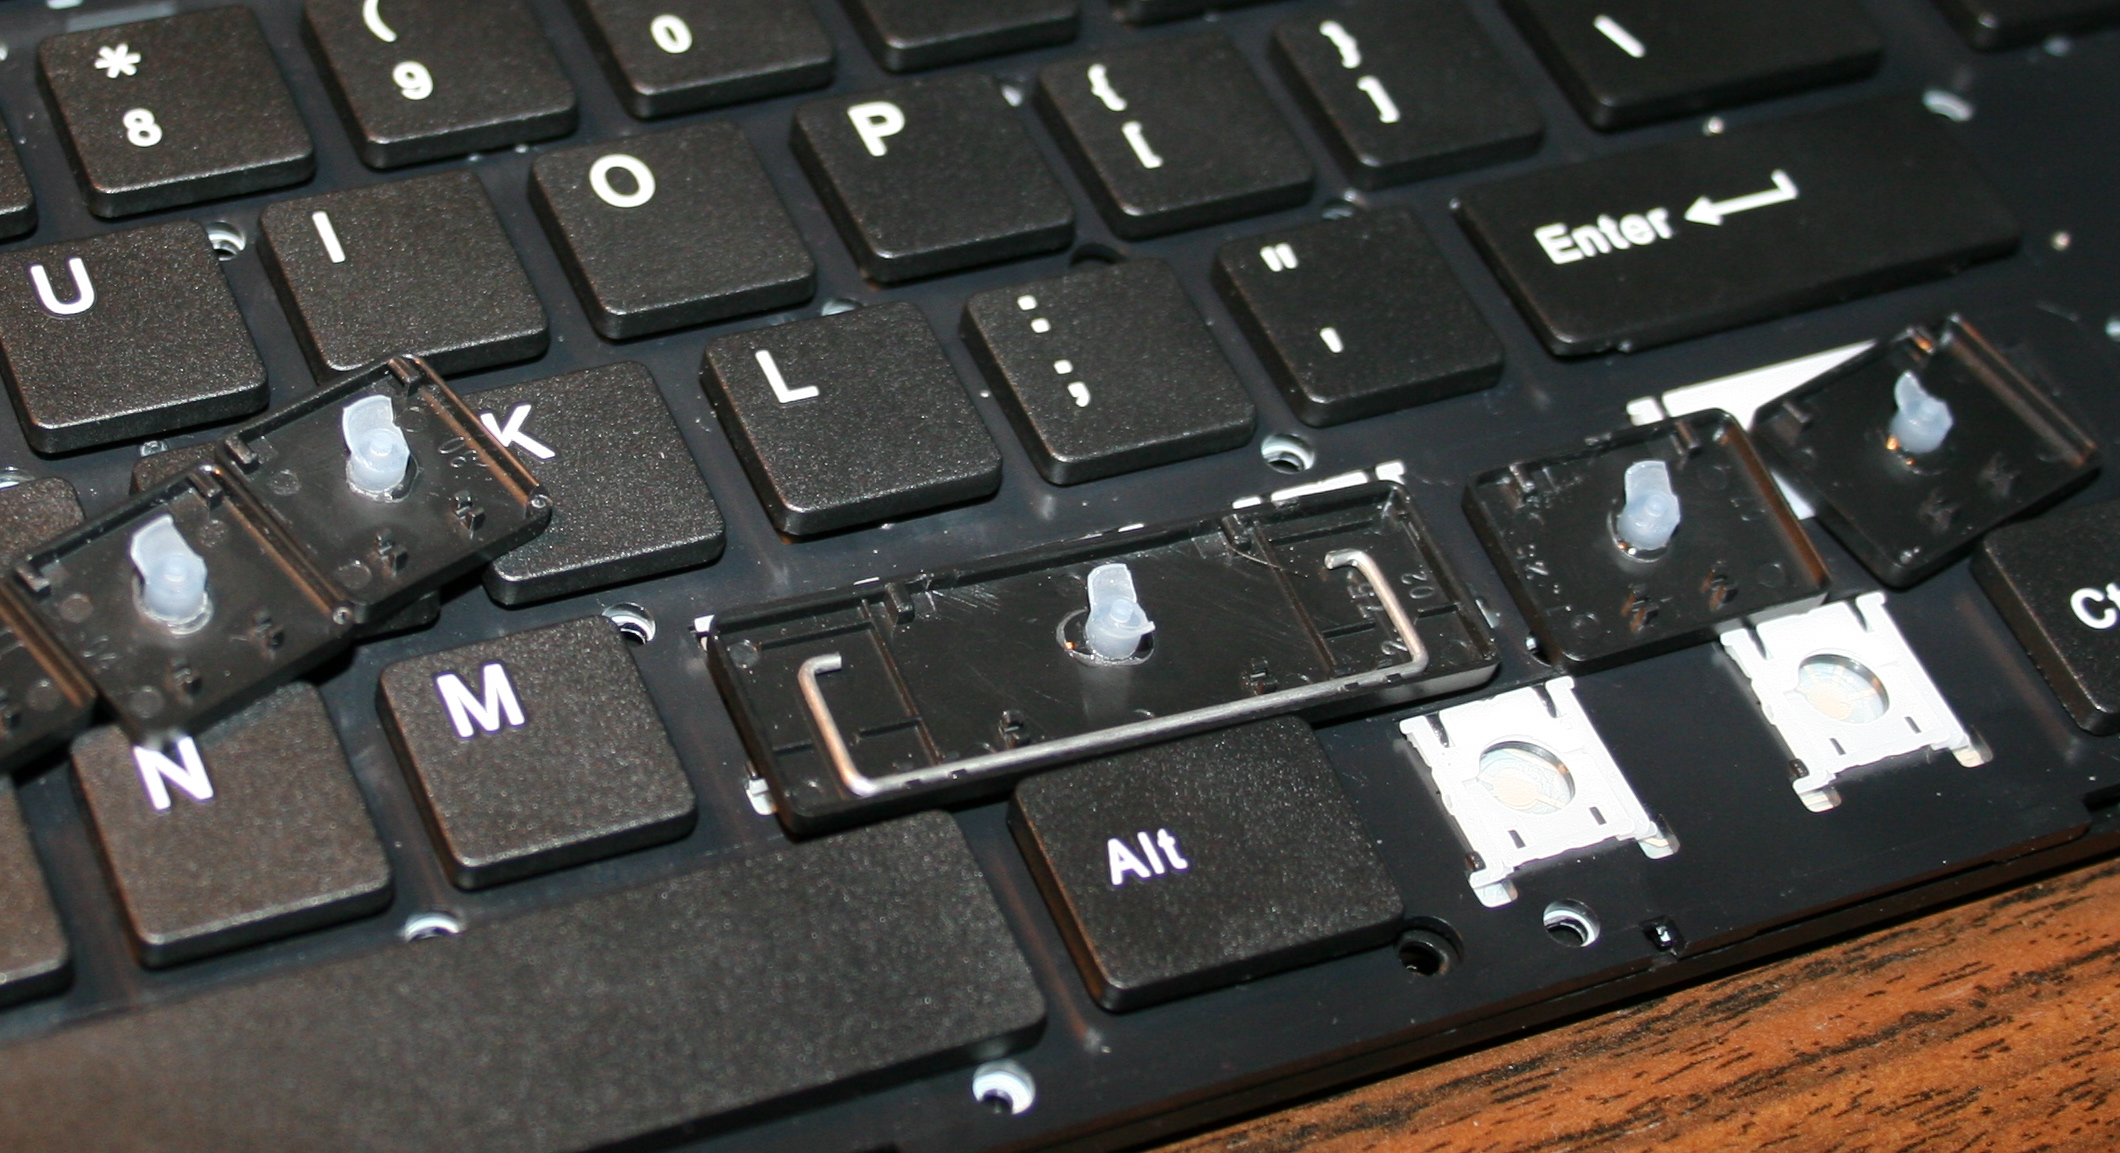
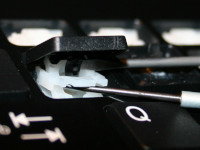
- Getting keys off from keyboard, using a tiny flat screwdriver.
Pushing gently (but firmly) and leveraging tiny screwdriver in 1 corner, to pop the key’s scissor lift (white) out of its “half socket” from keyboard (not from top of key). - Getting rubberdomes off from foil, using just fingers, pinching with force.
In laptop keyboards, the rubberdomes are separate and small.
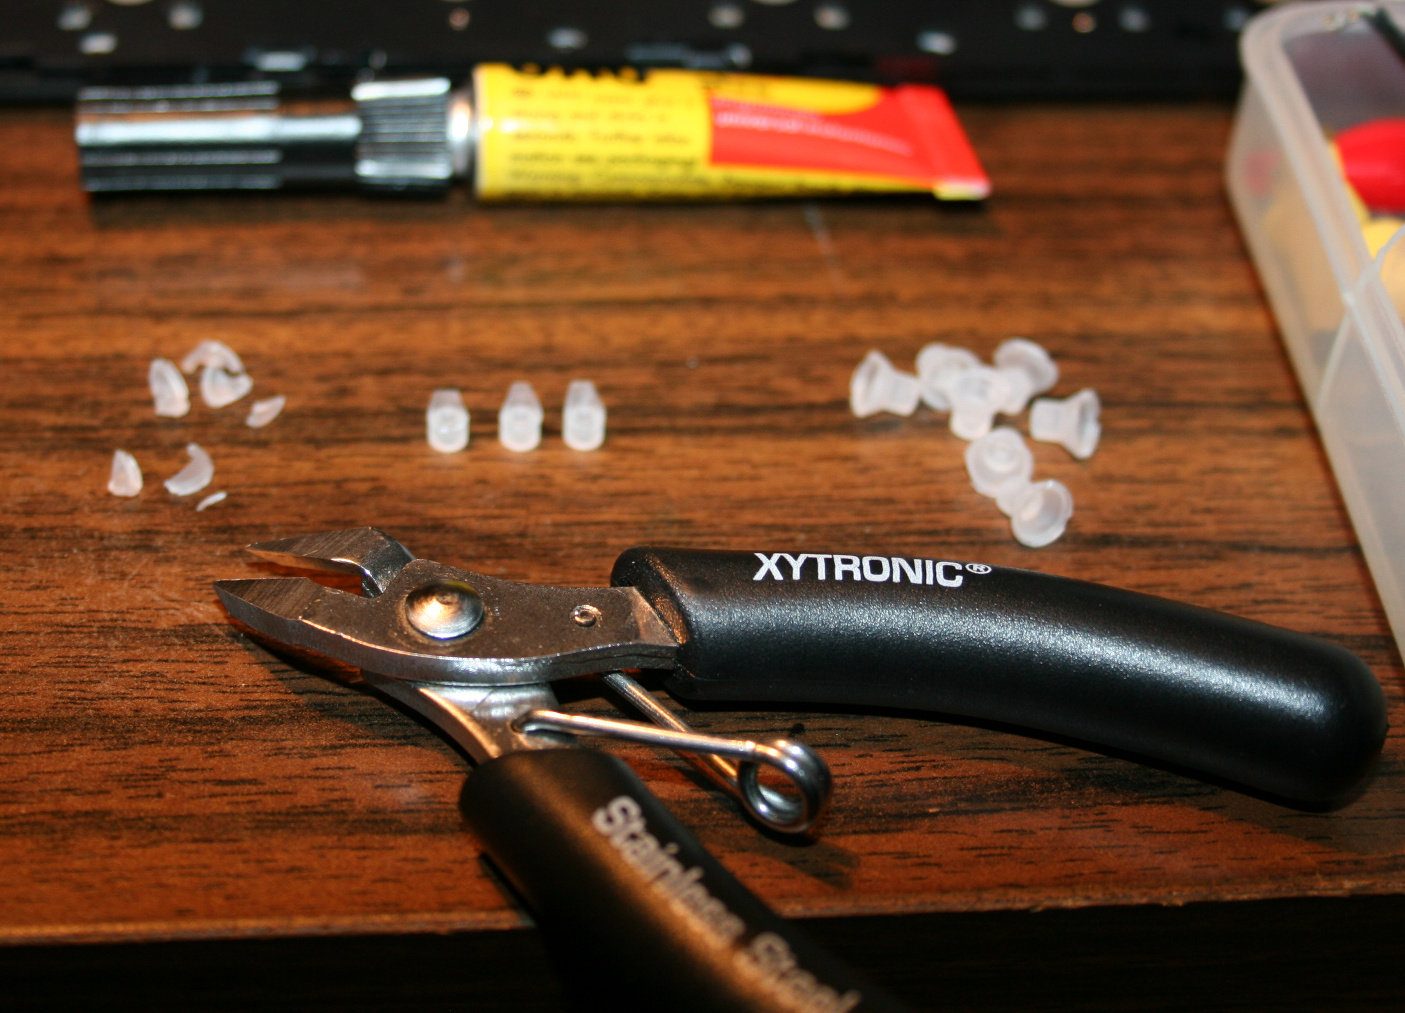
But on old very cheap keyboards there is 1 big rubber piece with them all. I didn’t try modding them. - Cutting off rubberdomes, using small side cutters.
The more you cut off the less force and travel. But caution for bigger keys, especially Spacebar, they need a bit more rubber width left (or in 2 places) for same force, becuase they are heavier.
I did reduce modifiers (Shift, Ctrl, Alf) keys and arrows completely, without that short supporting width, they’re just resting on keyboard foil, this gives only 9 g force. Value depends on foil, and not at all on rubber because there is none left.
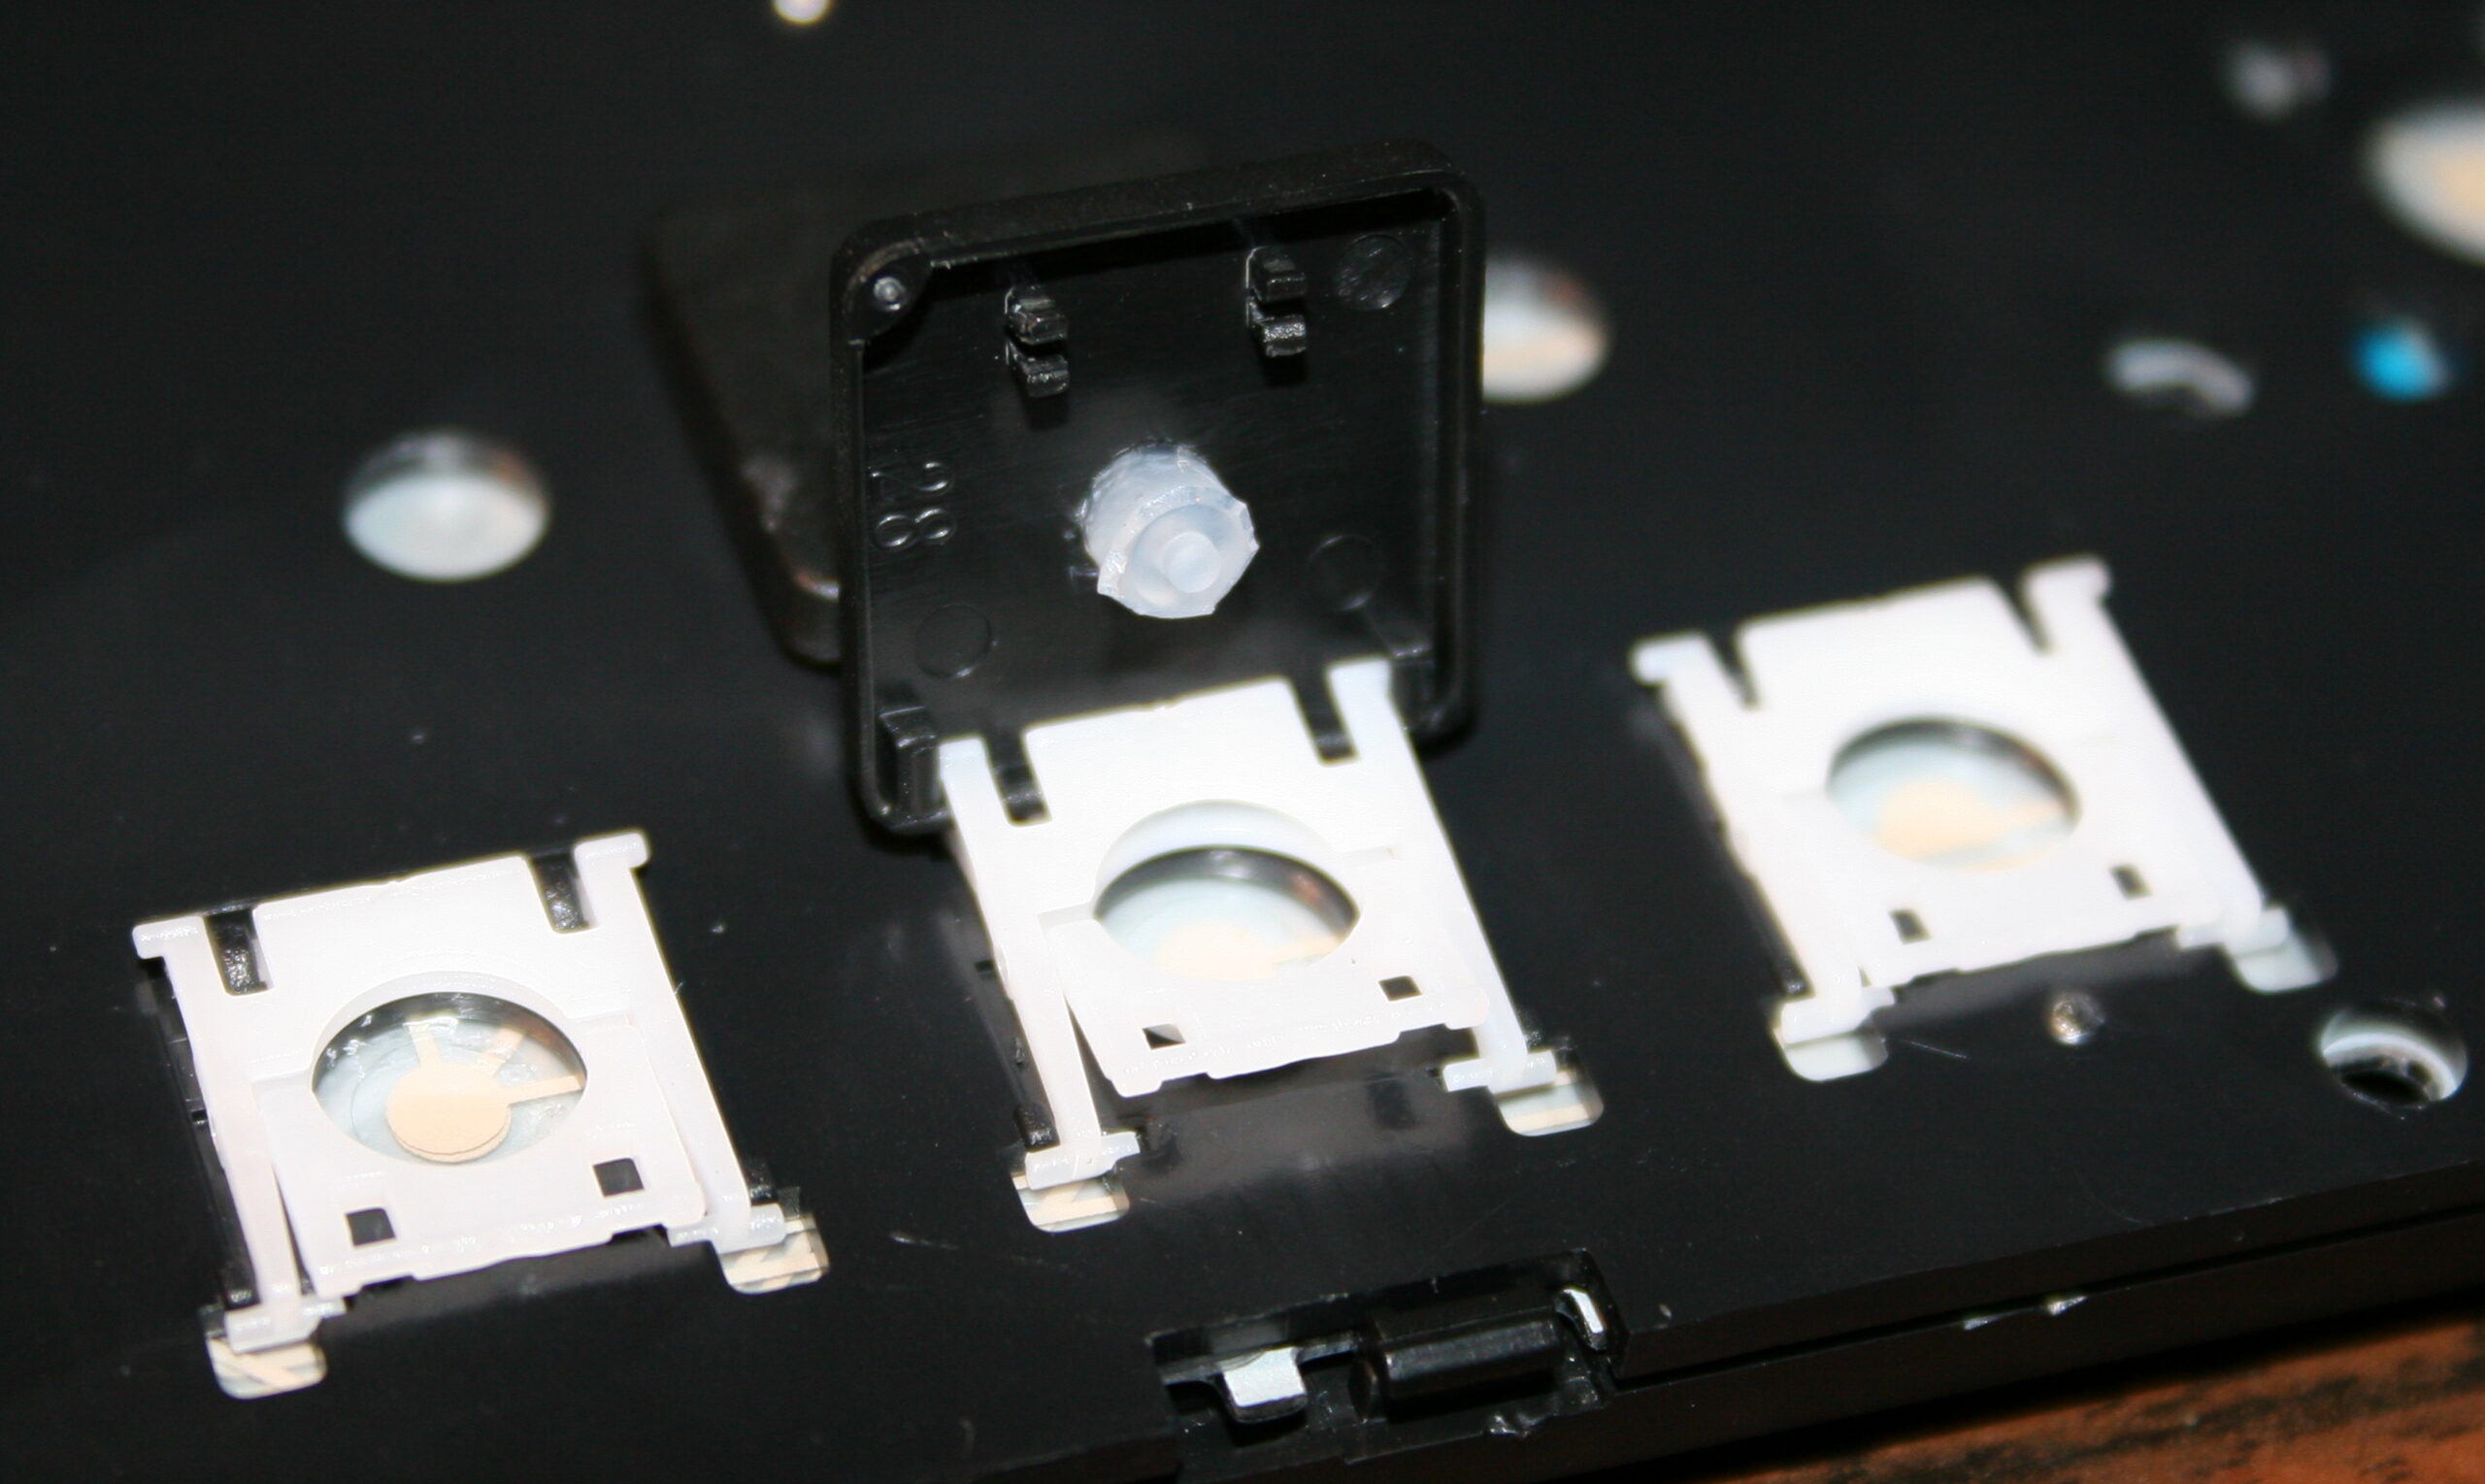
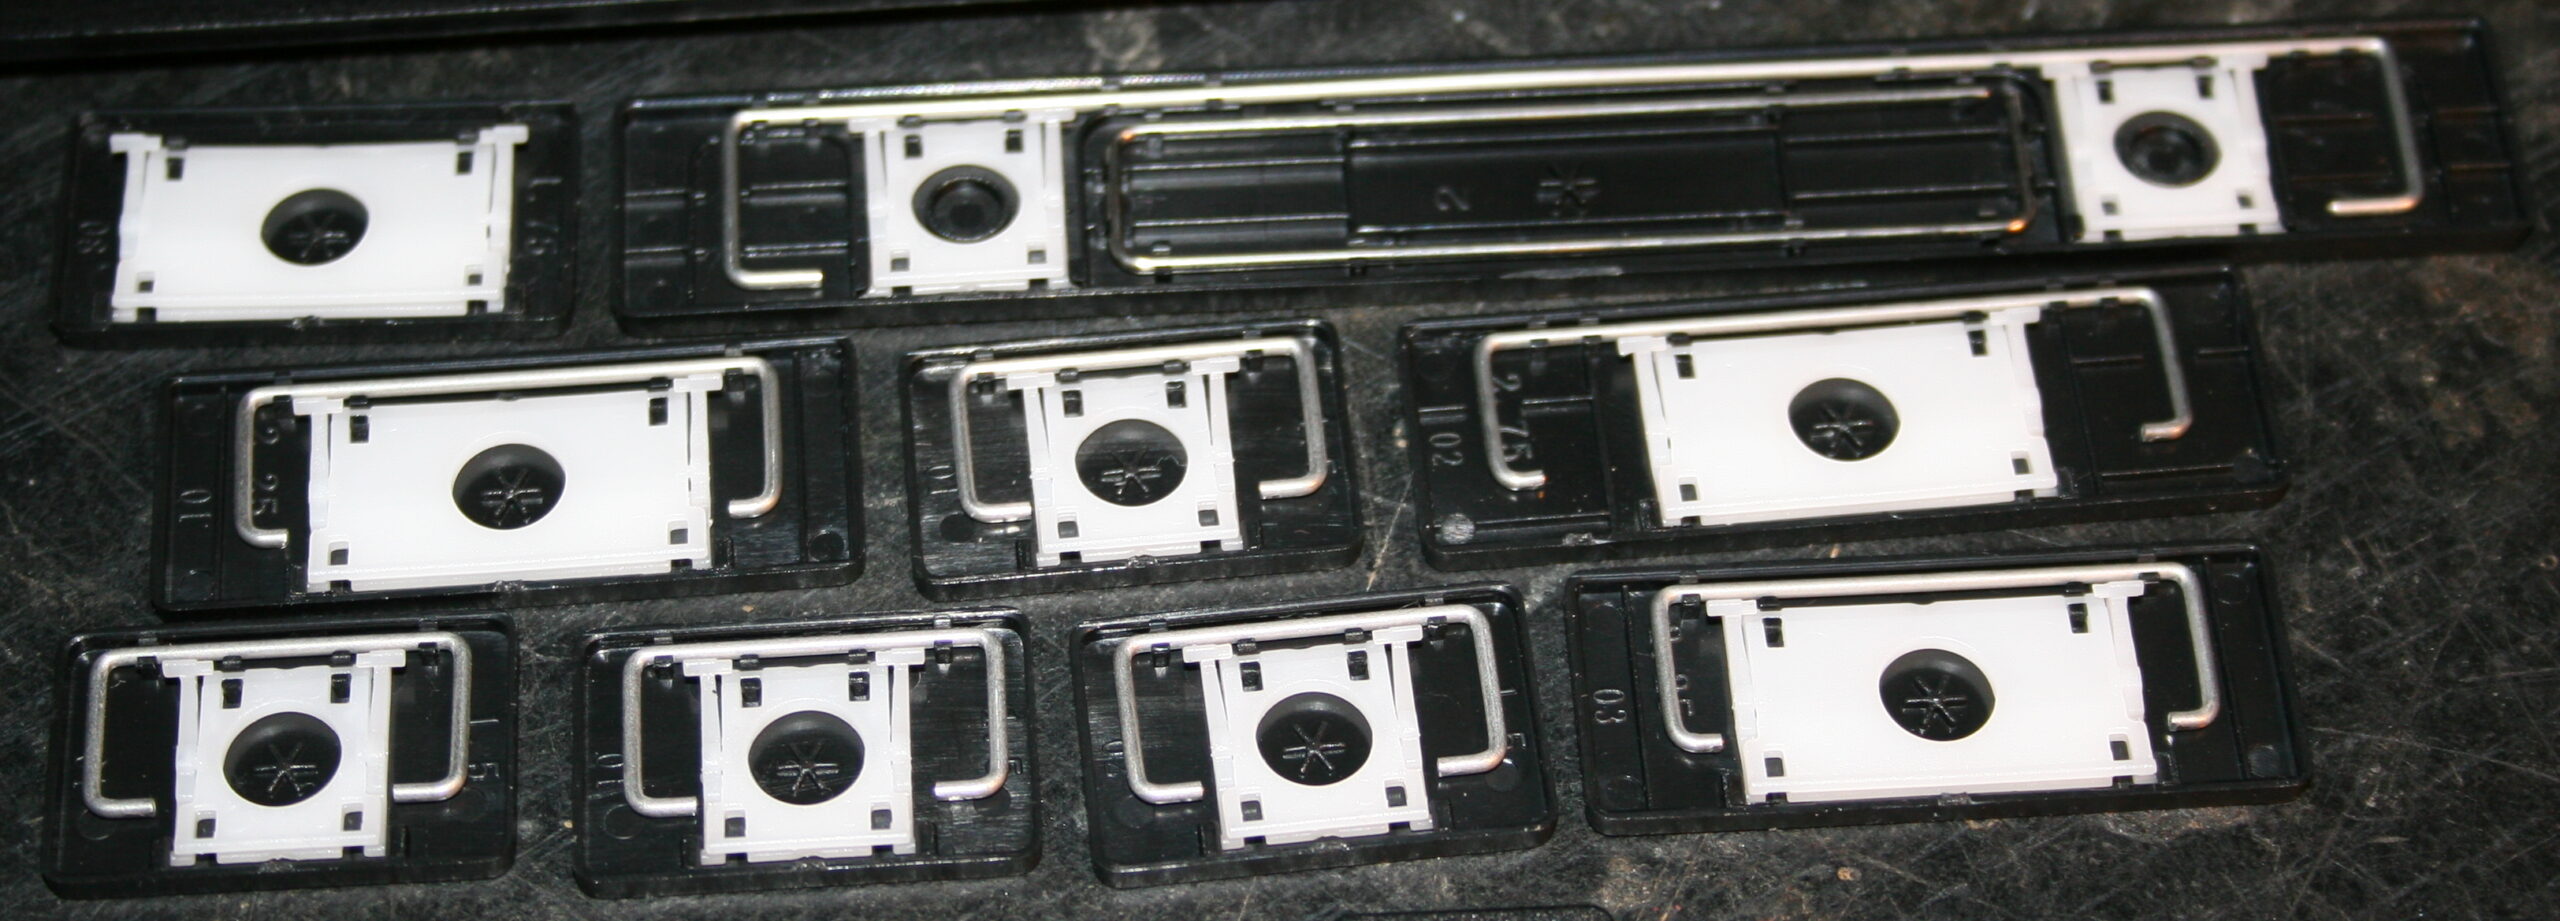
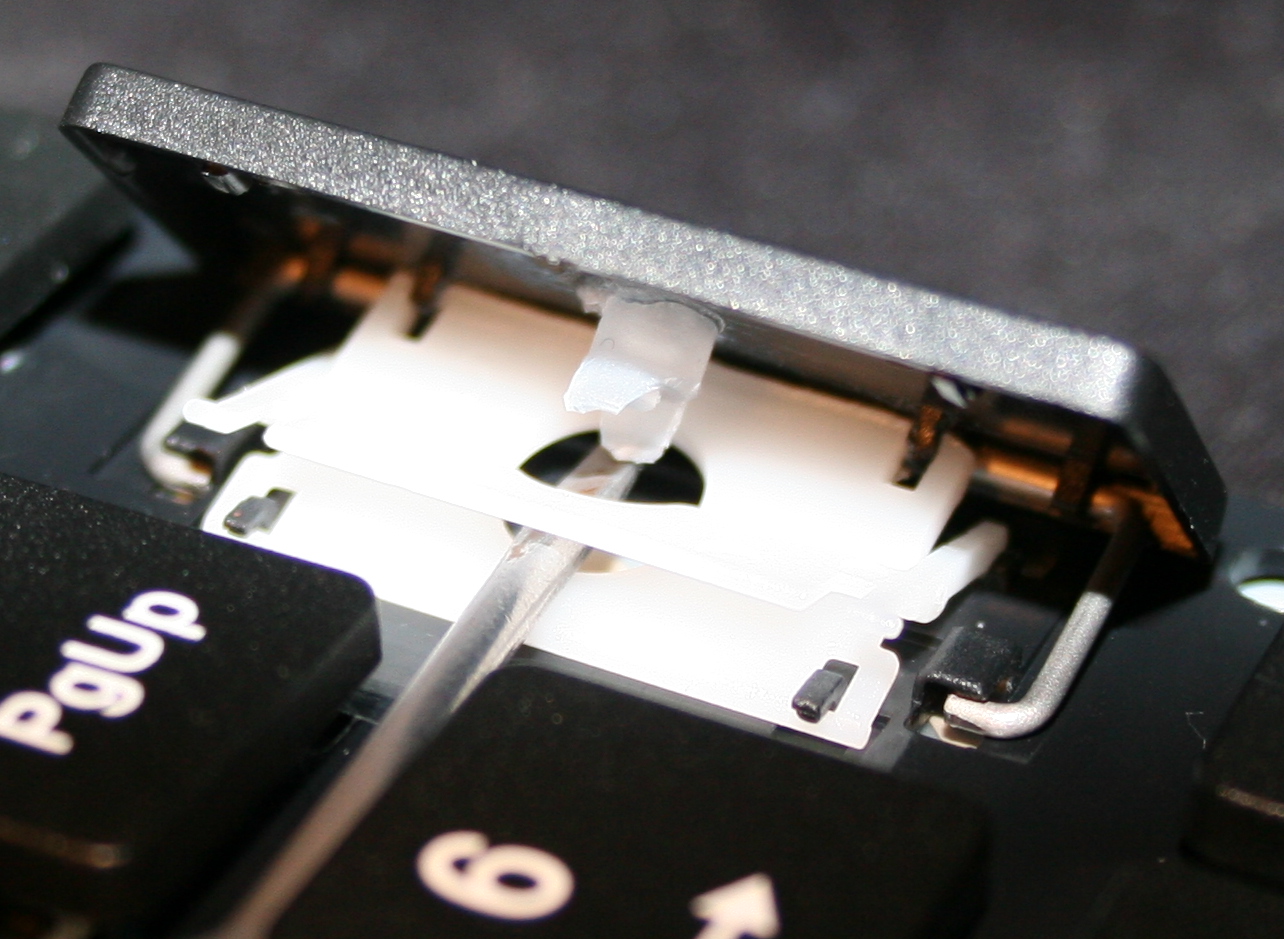
For most keys usually few mm width and height (3-5 mm or so) is holding it above foil. - Removing scissor plastic (white) from key (black), using a tiny flat screwdriver.
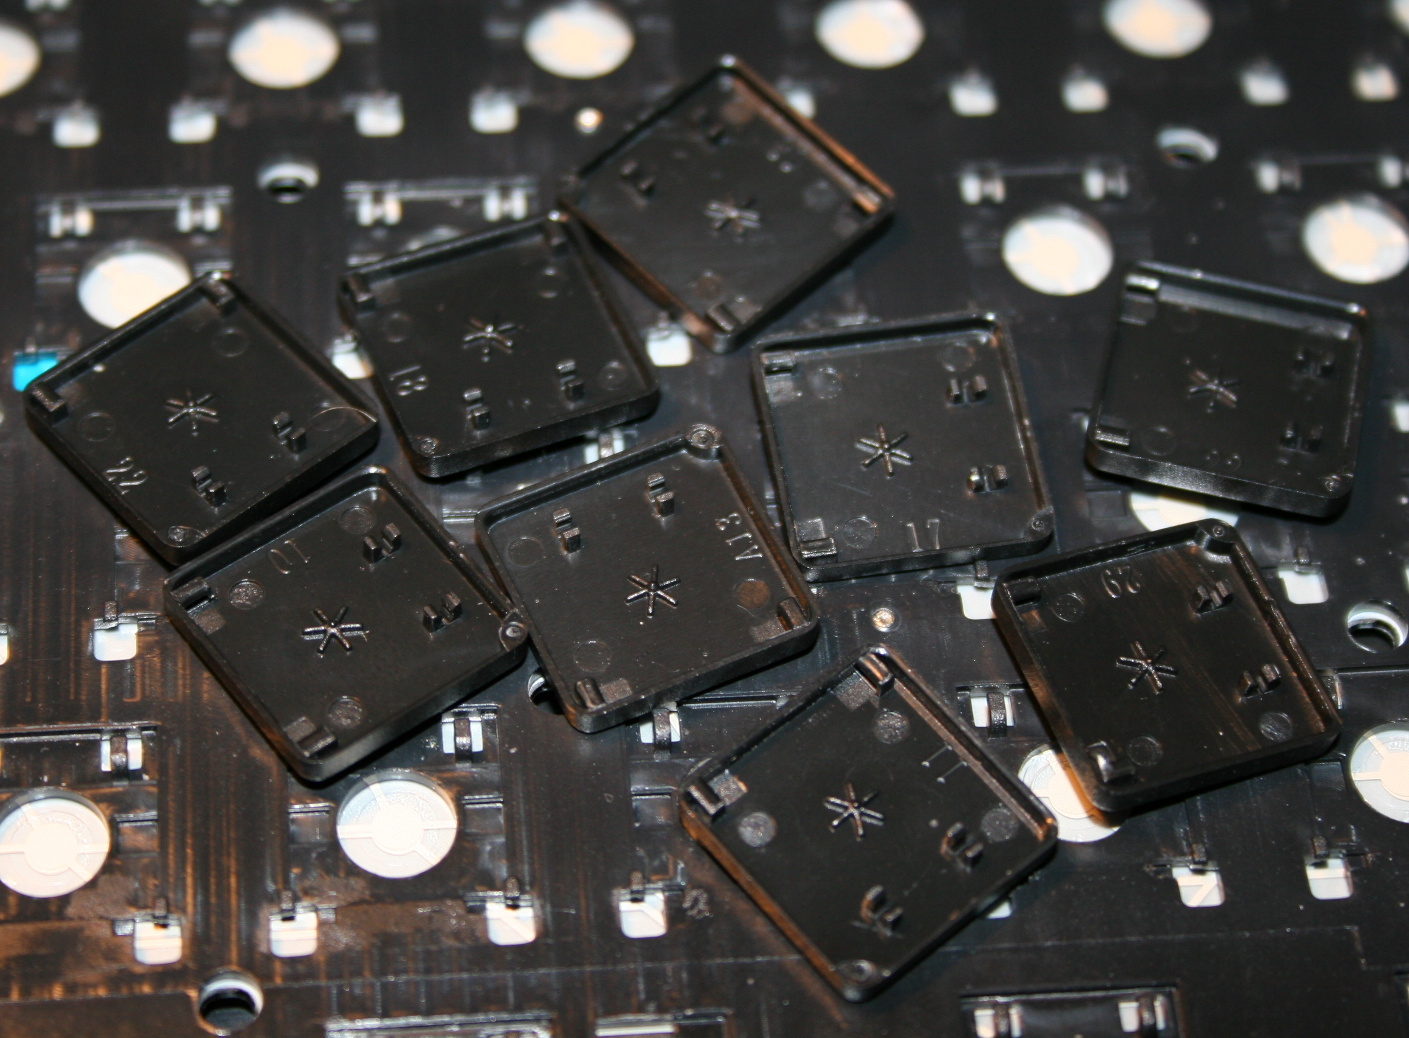
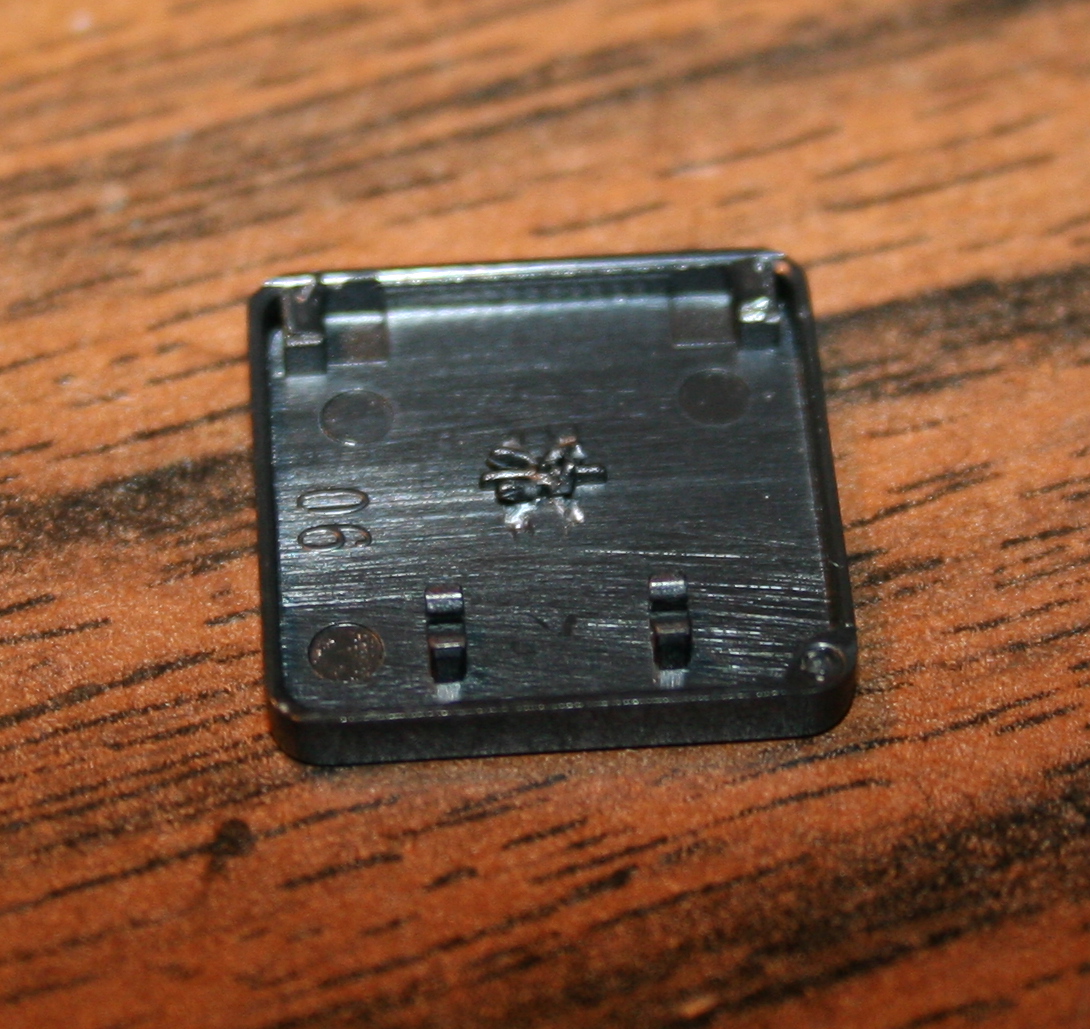
- Optionally (if present) scraping that (stupid) star * pattern made on keys, to be flat. Can be scratched with cutters or screwdriver, may be even better so for glue.
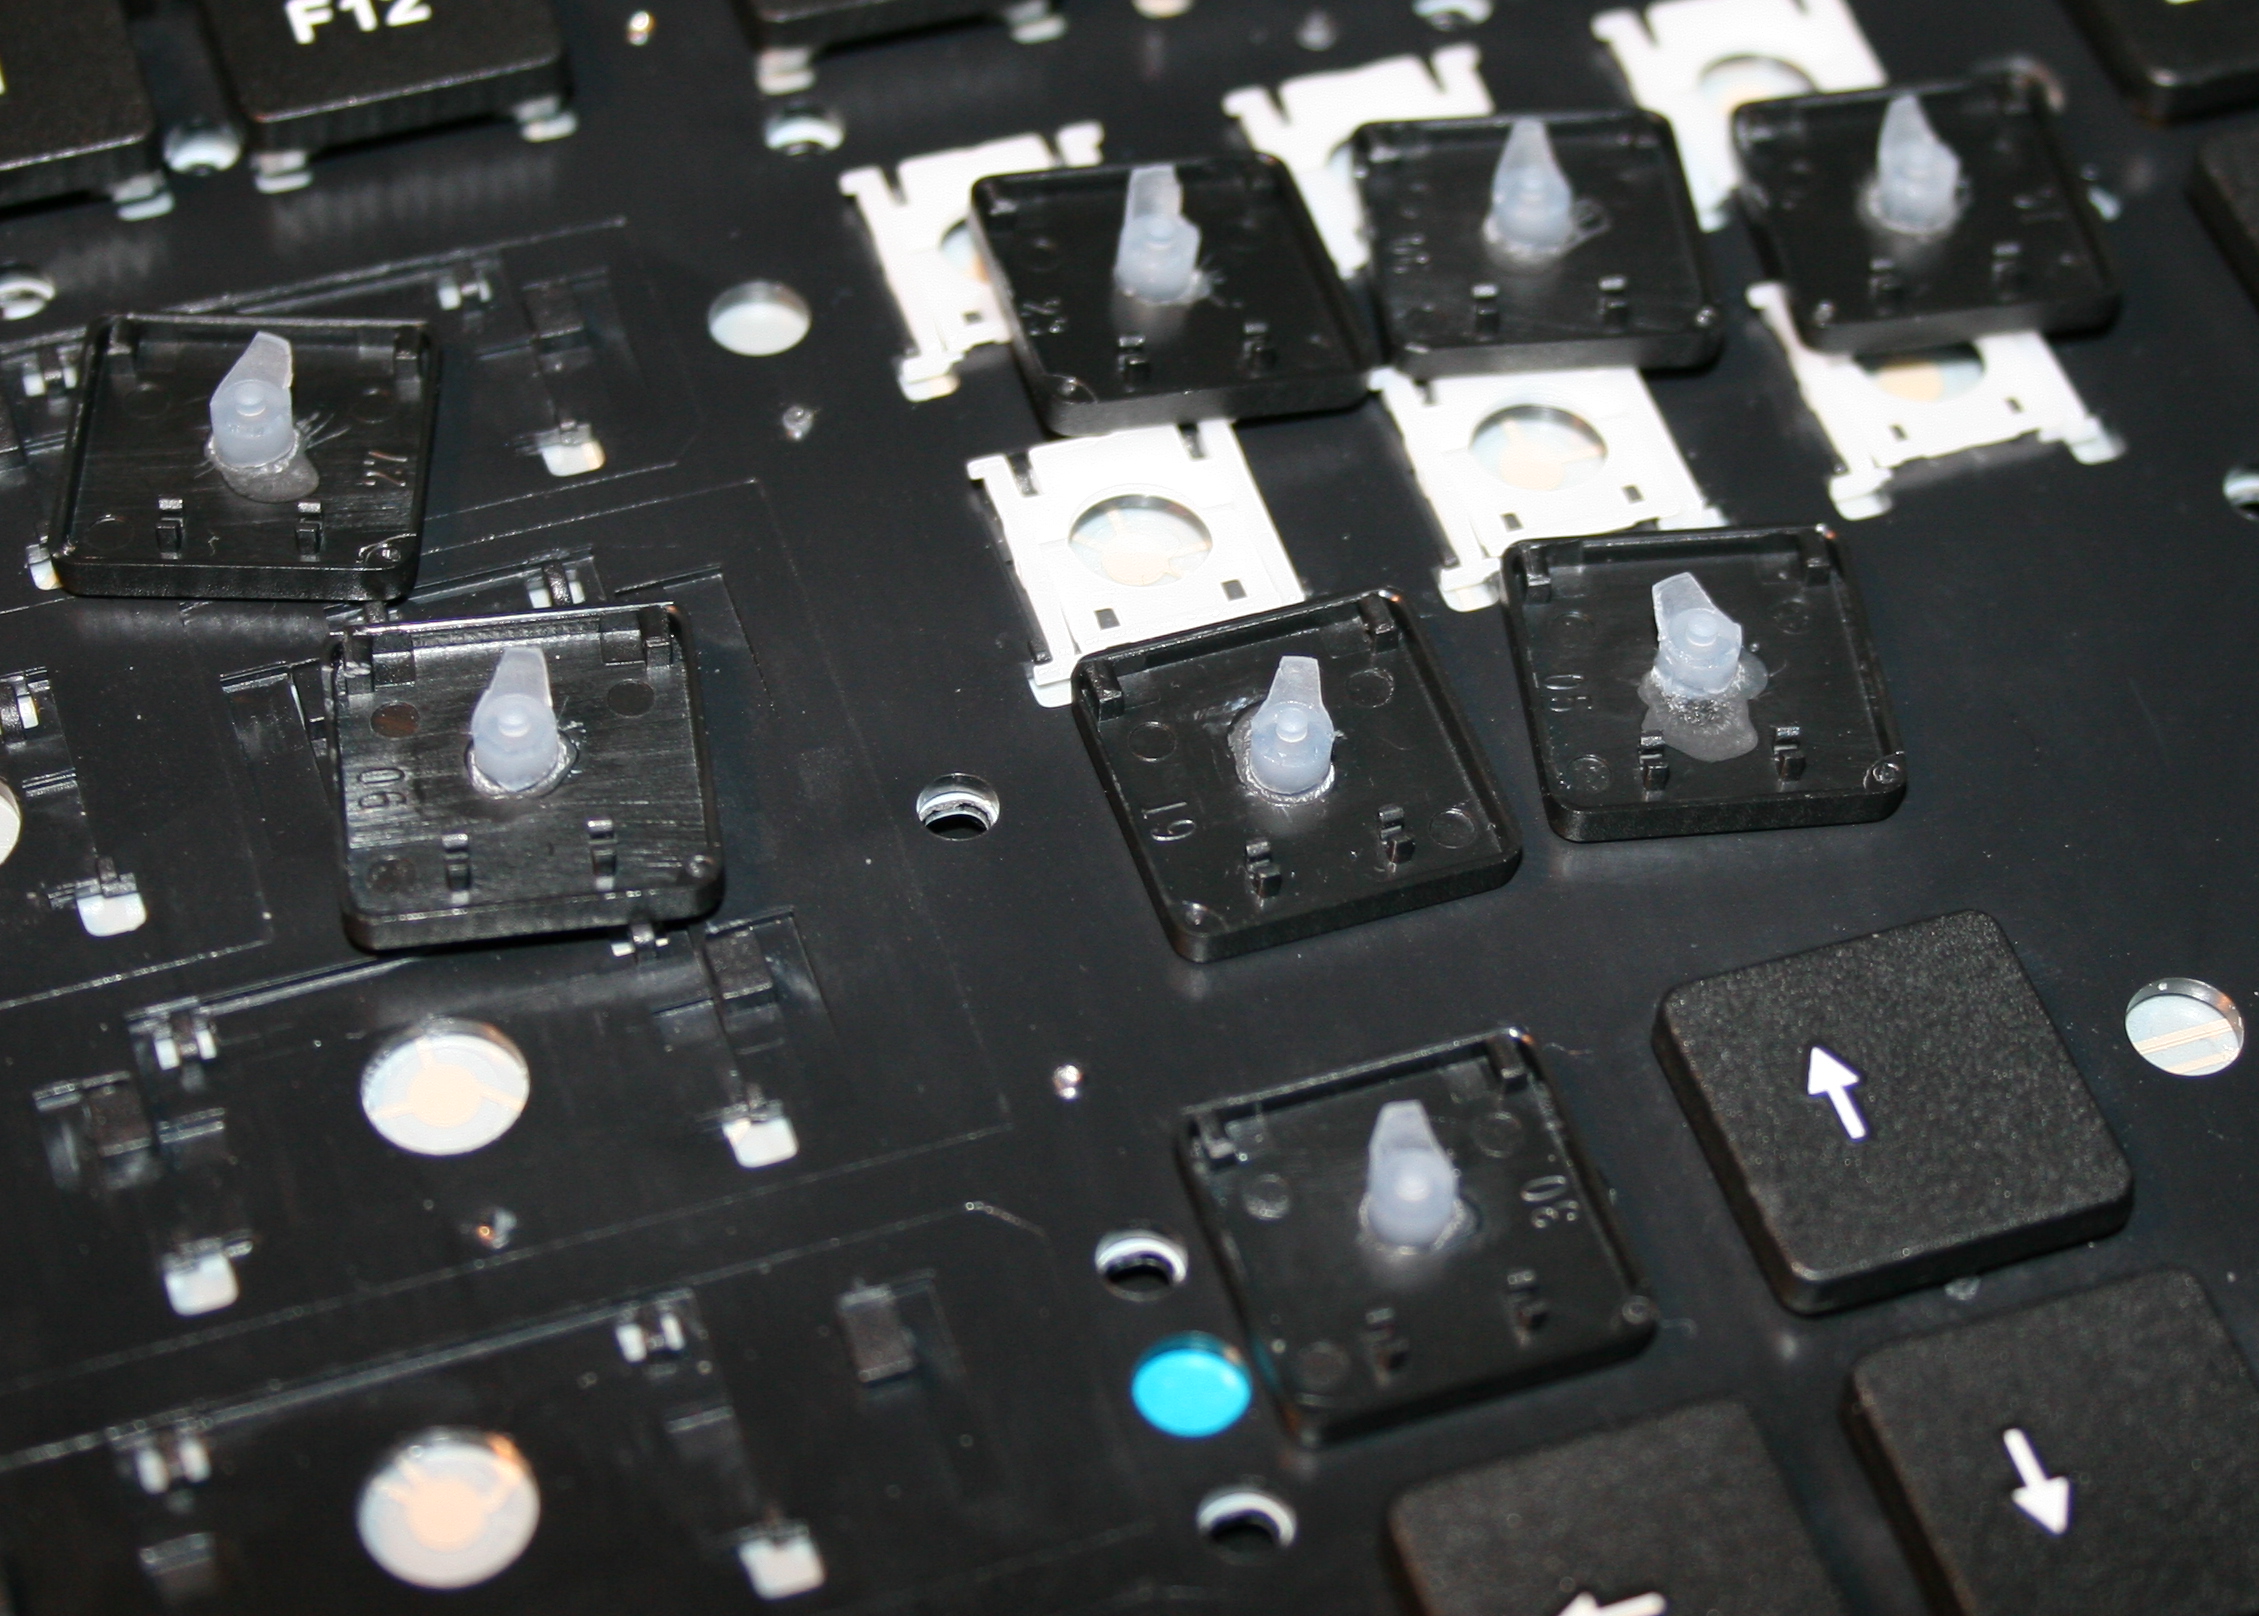
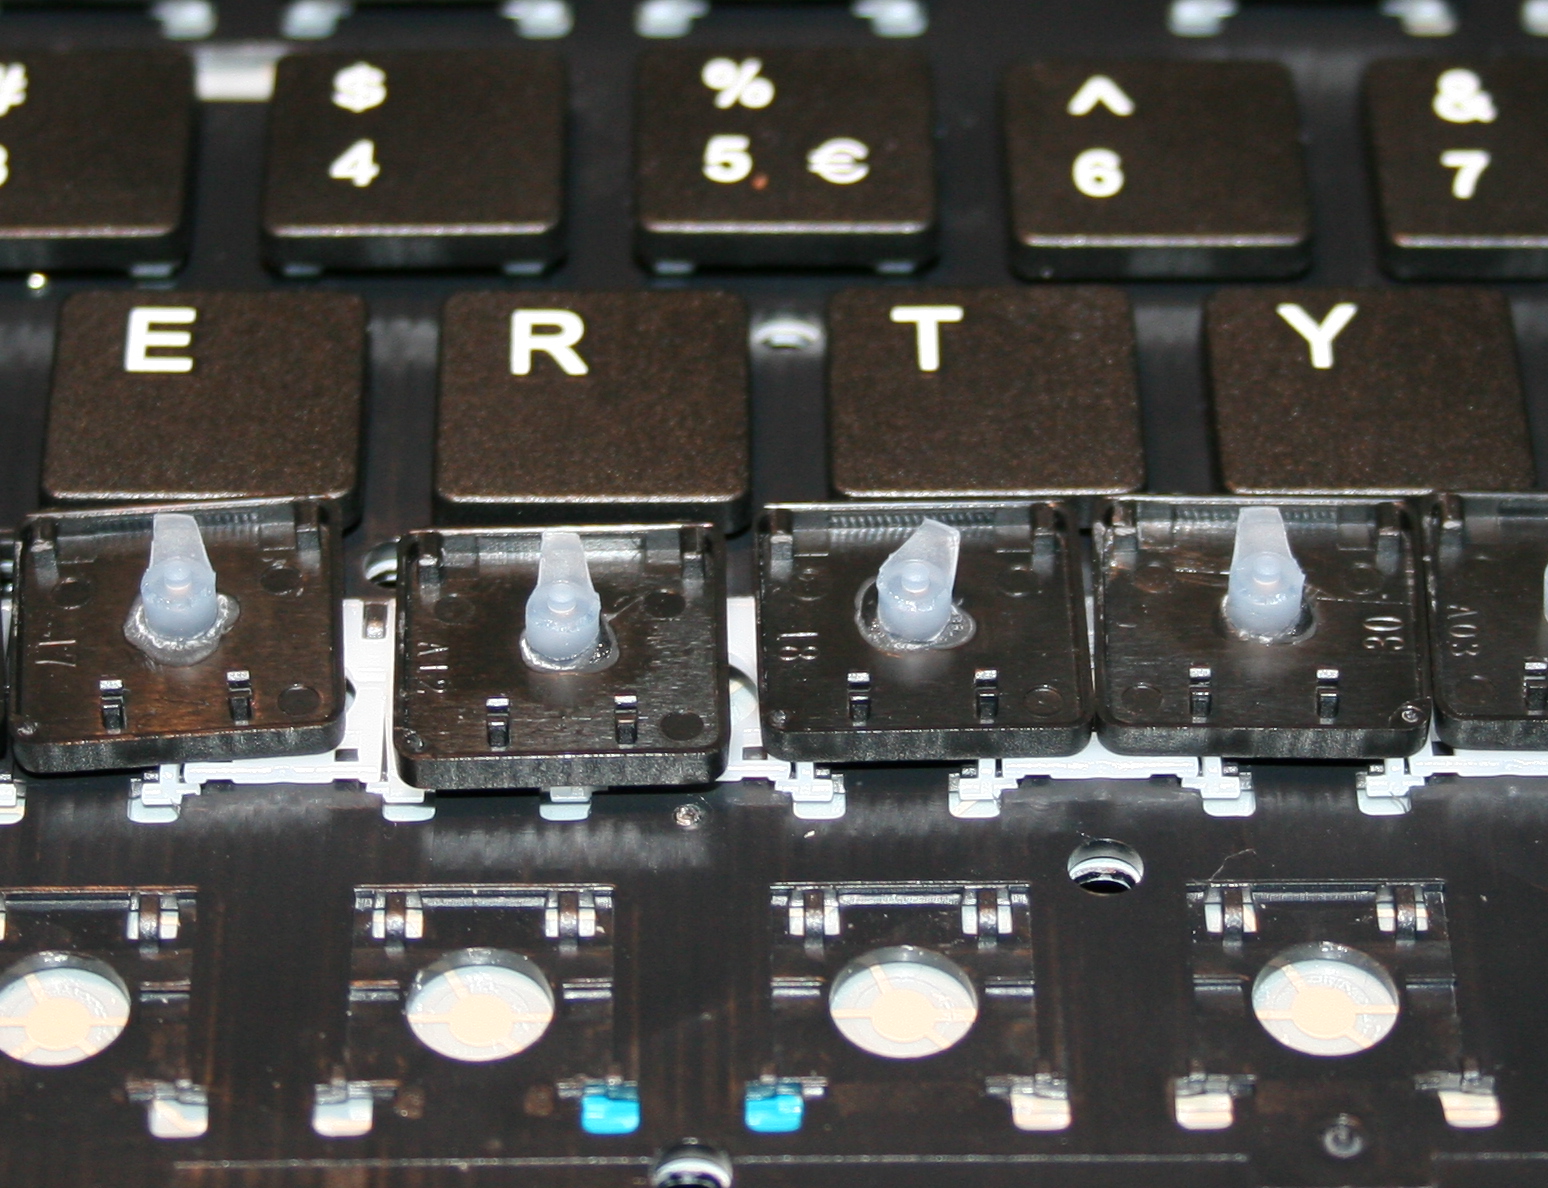
- Glueing (reduced rubberdomes) back to keys, using any superglue (cyanoacrylate based).
Holding with tweezers or smallest pliers for a few seconds. - Waiting (best about 1 minute) until glue gets solid and ready.
On video I’m actually making this too fast. Depends also on how good or fresh (after opening) the glue is. - Lastly mounting keys back, rather easy after knowing how the scissor keys work
- Repeating for each key. Unfortunately it is really boring and tedious. Took me about 2 days for 1 keyboard.
📷Galleries
Light press mod 9-18g (CK5, from 2015)