2010-15 SR Track Editor 🏗️
C++, 3D, Tool, Program, Ogre
Contents
⏱️Overview
SR Track Editor is the program that comes with Stunt Rally and was used to create and edit all of its tracks. It first featured in version 0.6 (6th release in Nov 2010) and in version 1.0 (10th release, in Jan 2011) it was already fully functional (could edit all track features, at that time).
I will describe here its features, from the latest version. It surely evolved with the project and changed its look in time. Unlike the Stunt Rally page, which shows the whole history, here I’m describing the present (it is free and open). And I focus on features, visible on GUI.
🔍Detail
Since the program is rich in features this page will be long. But also explanatory, for unique tracks and game features. I also reference any tracks that show off a particular feature with links to our online track browser.
Editor is 100% designed and coded by me. There were many contributions to the game, but none to editor. I customized it to be a fast tool for editing, as I was also the main user of it. There were few awesome people using it too and creating tracks for the game.
There is a series of ▶video tutorials for using it (from older versions though) and a Wiki page. If using editor, keep in mind that many places (GUI controls) have hints, so mousing over them can show a tooltip, possibly with useful information. Editor itself has help pages, listing key and mouse actions for each mode. Having seen all this, it should be easy to use it.
📊Features
One main aspect of editor is that it doesn’t feature an Undo/Redo, for me this feature was never needed and too time consuming to implement. We use quick Save F4 and Reload F5. One can also make backups manually of the directory. It is recommended to save often and on mistake just reloading.
Track tab
Track tab is the first I’ll explain. It takes some time to understand all what is visible here. Knowing it will help picking your base track to edit. Or finding an interesting track to drive.
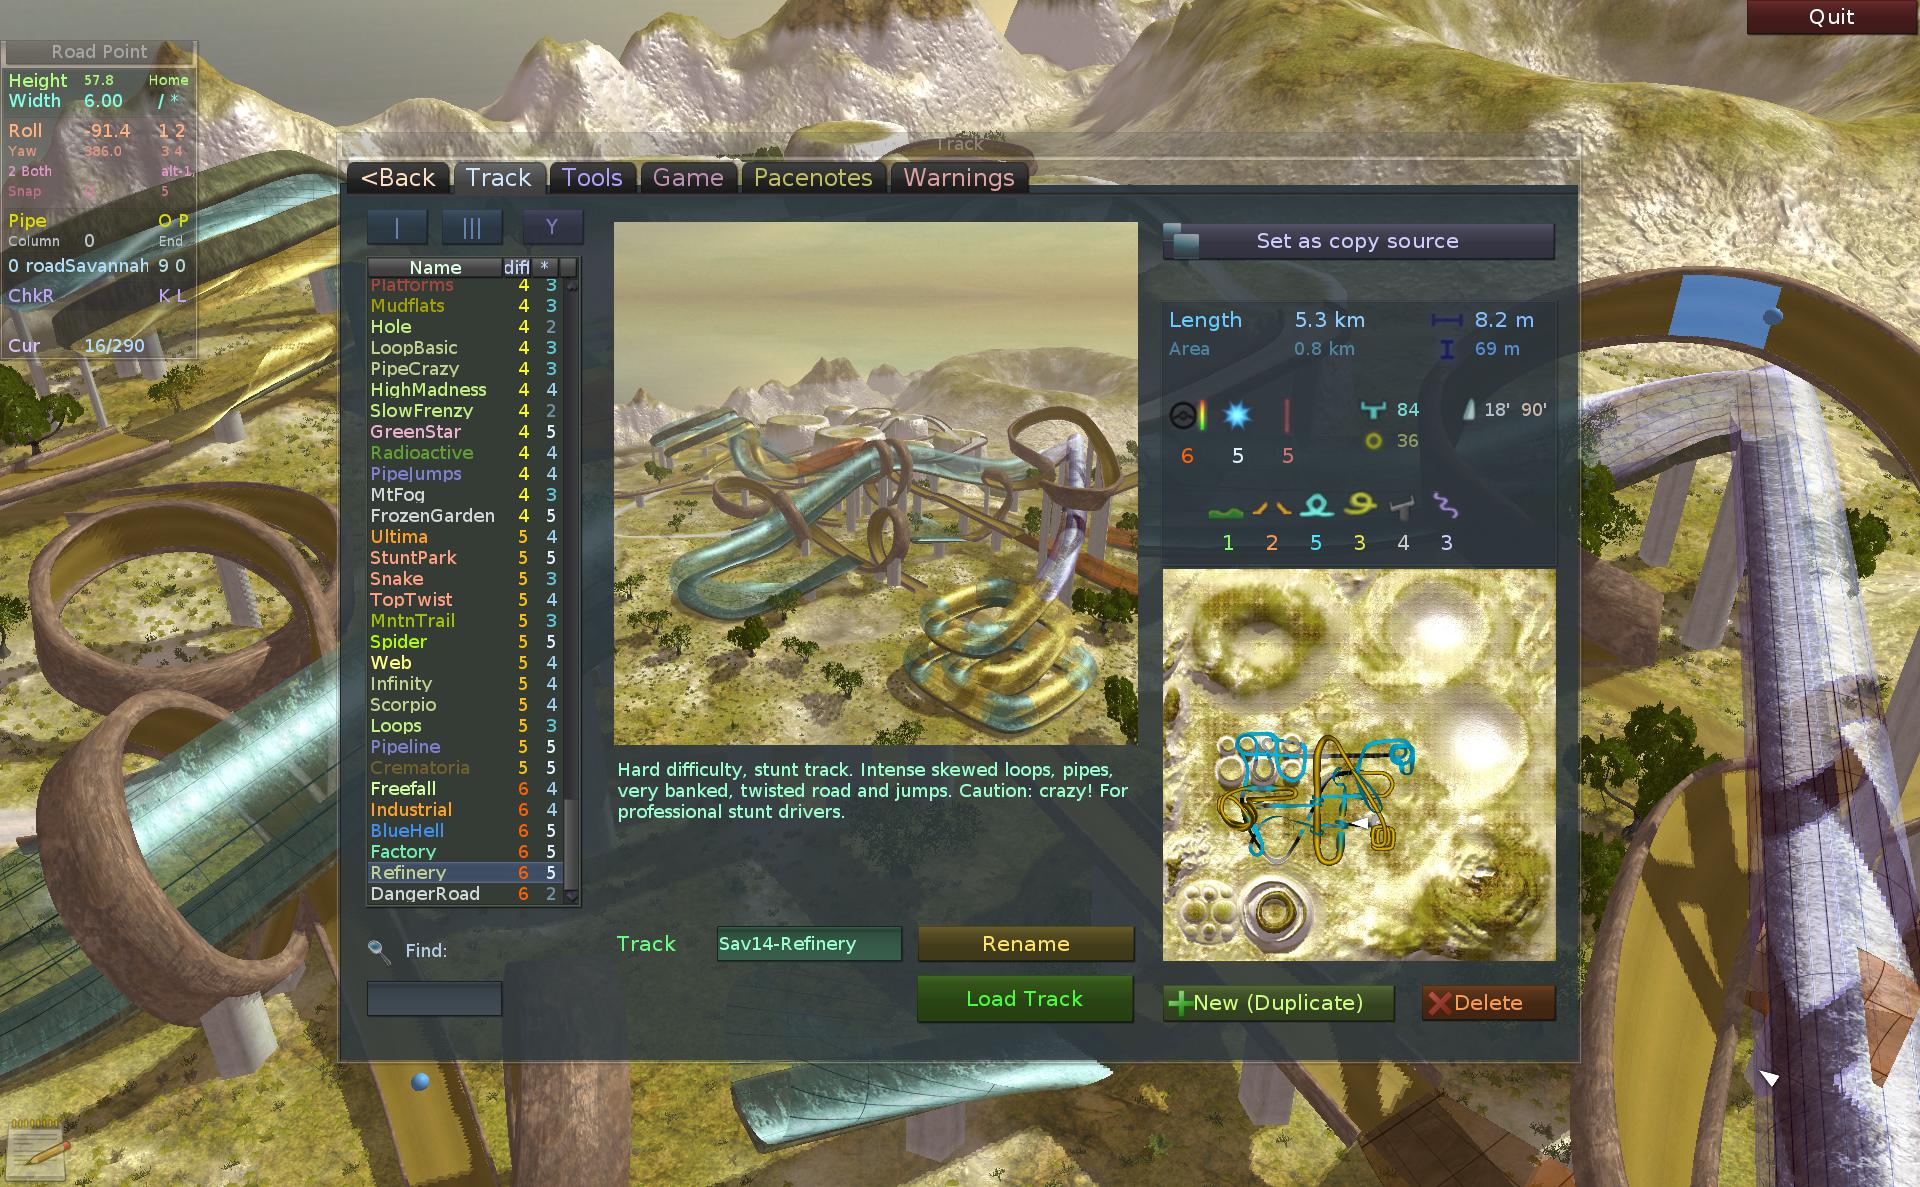
First, on left we have the list of tracks (172 total in version 2.6).
In the middle there is an image with view of the track. Usually camera is high to show most of it.
Below a short description. It is sometimes crucial to read it on difficult tracks, as it may contain useful warnings and hints. It’s writable in editor.
Right bottom image is the minimap (view from top). It has useful info too. Background shows terrain shape. Flat road is black line, bumpy or banked road gets more gray. Bridges are cyan, pipes yellow. Half pipes will be green (0.5 mix between cyan and yellow). And lastly On-Pipe driven sections are orange.
The track list (on left) has 2 extra columns: difficulty and rating (*). You can sort on them to easier find the tracks you want to drive. This is the default short view. The detailed view has many columns and can be toggled using the buttons above it [ | ] and [ ||| ]. Some useful columns are N: (track index, sorting to get oldest to newest order), Scenery (we have 34) and ver (game version when track first appeared).
Next button [ Y ] toggles an additional, complicated filter window. It has sliders for min and max values for all columns and checkboxes to toggle their visibility (possible in both views).
Since the tracks count is very high, we have a find box (bottom left, Ctrl-F), where you can type name or phrase to search.
Use track load button or press Enter to load it. Arrow keys move in list (with Ctrl by 5).
Duplicate button will make new track which is a copy of loaded one. There is no New button since it’s easier and faster to start from an existing track with similar scenery.
Track icons (extra)
Just above minimap we have a row of icons with small values indicating various things on track (they disappear when zero). Those are as follows: fluids (water or mud areas), bumps, jumps, loops, pipes, banked bridges, frenzy (curly road), obstacles and objects (dynamic). Of course hints for them will show under mouse. The higher the value of each, the more will be there on track and thus it will become difficult.
Above this row on left we have track difficulty (most important) value: 1 (green, easy) to 6 (red, extreme). Next is rating (star icon), it is my personal quality assessment of the track. The third icon (red vertical line) is general (coarse) length.
All those show in columns in detailed view and the list can be sorted by one. This allows searching for tracks with e.g. most loops or fluids etc.
They all are set manually (be me) for official tracks and stored in tracks.ini file. User tracks have none.
Track stats
The next group of road stats is above icons and those are automatically computed by the road system. They are: length (in km), area (just side length of the always square map), average width, height difference (between highest and lowest road point). Below in middle center, with icons are: bridges percentage (cyan), pipe % (yellow) and on pipe % (red) on right. Above on right are road banking angle values (average and maximum).
So that was a lot, and this is only the first tab. But it’s also present in game, and nearly the same.
Sun
Sun tab has all the options for sky, light and weather (and fog on next sub-tab). If in editor, you can read hints from tooltips for more info.
Sky can be rotated to better fit track. Sun direction has rotation too (yaw), and pitch sliders. For example small pitch will make long tree shadows.
These angles will be set when picking sky from list (if checkbox for it is set there).
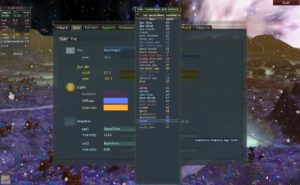
Pressing sky name button will show pick list with all available skies. Tab key is the shortcut for this (on other tabs too).
Weather has 2 possible slots. Each can have one of many different particle types: rain, snow, fine, heavy, storm etc.
Their intensity (emit rate) is set with sliders.
Since it’s usually not needed to see weather emitting while editing track, it is toggleable here (or with key I).
There can only be 1 light source in game. It is directional and is called sun.
For this light, we have 3 parameters: Ambient, Diffuse and Specular. Ambient is the constant background color. Diffuse depends on surface angle (sun direction versus surface normal). And Specular is similar but has also power, it is the shininess.
All colors here have: Hue, Saturation and Value (Brightness), which are obvious. But additionally, Value can go above 1, lightening more, used e.g. on deserts (Dunes etc). And there is a new Negative value, very rarely used. It can act as a negative light, decreasing brightness, e.g. a blackening sun on BlueHell.
Fog
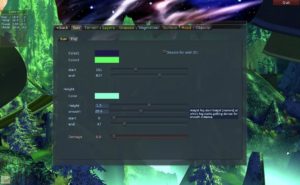
It is a cheap effect, already present in earliest games. But quite good and present on most tracks.
Fog itself is linear and has 2 sliders: start and end. Until start distance there is no fog at all. And above end distance, there is full opacity fog.
Fog can have 2 colors. If not needed those can be the same. Useful for example on a sunset sky where one color is orange near sun and other can be gray on the opposite side.
Height fog is an additional type (with own color) added to there regular fog. It depends on height, so gets denser when lower. Start and end parameters are here too (to allow own values for distance). Height and smooth values determine where it will be and how fast will it be dense (opaque).
Fog colors (beside the Hue, Saturation, Value and Negative) can all also have Alpha (transparency). When below 1, fog never reaches full opaque in end, allowing some visibility.
Higher than 1 for Value results in glowing fog, seen as light. Present e.g. on tracks: Pipeline, Crematoria, GreenStar and more.
Last thing for fog, it can deal damage (over time) to vehicle. Happens inside lava, acid, radioactive pool etc. E.g. on Craters, Radioactive and AcidLakes.
Video tutorial here (from version 2.1).
Road
Road is made using a Catmull-Rom, 3D spline. It can go in any direction. The system building geometry for it (segments, with LOD) was also coded completely by me. Started in the earliest versions and developed further to support bridges, columns, pipes etc.
Let’s start with the simplest features.
Points
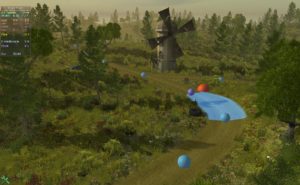
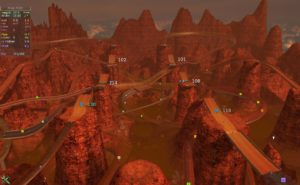
Road consists of points. Each point has several parameter values. Point is associated with road segment. As can be seen on picture, the blue spheres are road points. Selected point is violet. It also has a bigger red sphere beside it, which is used to show rotation for banked bridges.
Points are inserted inside the glowing segment. The simplest road point parameter is width. Road width gets smoothed between points.
Checkpoints
A point can have a checkpoint sphere radius set. For road on terrain it’s recommended to be wider than road e.g. 1.6, but this will vary in places, bridges and pipes naturally have 1.
Checkpoints are set manually for each track and used for many things: driving progress percentage, direction arrow (where to drive), also a beam (in place there), and most importantly to show Wrong Checkpoint, if driver misses it, while being too off road. They are explained in this video.
Bridges
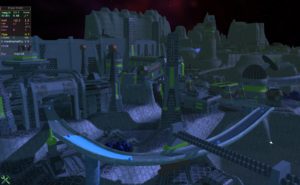
Those were points On Terrain. Now if you toggle this snap off (Home), it will allow moving point vertically and automatically produce bridges, with side and bottom walls and columns.
Materials
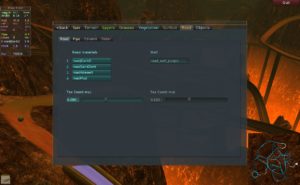
Next easy topic for start is road materials. There can be only 4 (for performance) and they are set in Road tab. There is also a pick list to choose from all.
Materials are changed with keys per road point, and this will blend (transition) in and out the material from close segments.
Also on Road tab, we can change wall material, and column geometry (radius, sides). Columns are added automatically, always in half of segment. They can be toggled off. But manual placing isn’t possible. Adding more road points, evenly can fix it. There is only 1 wall and column material per whole road (also performance).
Now let’s get back to the point.
Banked
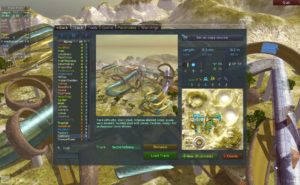
Having a point in middle air lets you rotate it. Changing roll angle will make banked road. This allows side turns and skewed loops like shown here (Refinery).
Pitch is never set, it is automatic. Yaw also, but it can be adjusted. It decreases width, but is sometimes needed, e.g. when creating loops (upside down road part).
Tracks with a lot of banked roads are e.g. Web, Spider.
Loops
Loops require 8 points or more to be good and smooth. And as we can see, having full control of each point gives freedom to create any types and original shapes of loops. Since they have walls, it’s hard to fall off of them, except when upside down and driving too slow, or for difficult, skewed ones.
Tracks with many loops are Loops, LoopBasic, Scorpio, Refinery, BlueHell, Crematoria.
Selection
At this point, it is worth saying that: (many) road segments (with points) can be selected.
Besides that one point (or none) can be picked.
The selection can be:
- Moved (all at once)
- Rotated (yaw, around picked or center), or Roll (used rarely)
- Scaled (to center or picked)
- Copied and then
- Pasted (even on different track), or Pasted reversed
- Mirrored (reverses order of points)
- Changed, i.e. some parameter value change, for all at once
And lastly picked points parameters can be copied, so when inserting, new one(s) will get same values. Makes it easy to e.g. continue a bridge in air at some height or split segment (add an extra point inside) etc.
Pacenotes
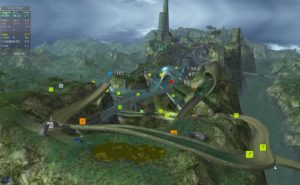
This track Factory, shows pacenotes in editor.
The system making them is (almost) fully automatic. This code was also challenging to write. But it proved my idea, we had already so many tracks and auto generated pacenotes for all turns were the way to go (saved an imaginable amount of tedious work if it had to be manual, also for any future edits). It is not perfect, as it sometimes does 2 turns where it could be just 1 but otherwise is great.
There are a few exceptions. Loop types (regular, side, barrel, 2 in 1, etc) have to be set on point manually as extra parameter. There was already one to mark a loop for game camera change. Next, jumps for their text with speed are using recorded track’s ghost, which means without it there is no info and also means that values will be exact only for ES car. All others will be scaled and may not match if aerodynamics is different. And lastly some roads have invisible parts that only tweak something and we don’t want any pacenotes there, another parameter to mark them not real was added.
Pipes
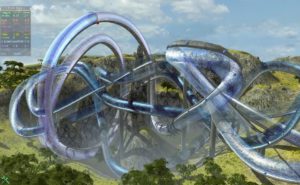
Introduced early and quite fun. Actually easy to drive in, since they direction the car in turns when driving fast. But will play tricks otherwise with beginners.
Also sometimes steering is needed in turns, or to counter act car inertia. And driving too fast will damage car bottom due to high acceleration acting too much on suspension (just like in loops).
Pipes require more triangles to be smooth and have own advanced parameters for geometry in Road tab. The most difficult part here though was making the transitions. They can start from bridge or terrain road, and both have a huge difference of width vertices compared to pipe. This value has to inc/decrease smoothly and make triangles/faces accordingly. Picture here.
Tracks with many Pipes are e.g. Infinity, PipeCoil, Pipeline, Ocean, Obstacles, Winding, PipeCurl, Pipes.
Half-Pipes
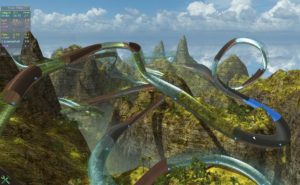
A pipe itself is just a value of parameter pipe for road point set to 1. This allows many other possibilities and having around 0.5 had the name of half-pipes. And few own tracks: Snake, HalfPipes, Knotted, MagicFog.
They are also one of coolest things in the game. Are more difficult than pipes, since you can fall out of them.
Of course pipe is a factor for each point and it can have any value from 0 to 1. E.g. 0.1 will be nearly flat bridge (with no borders) and 0.9 will give a not yet fully closed pipe.
Since pipes were very easy, at some point obstacles were introduced inside them. More on that later in Objects section.
On Pipe
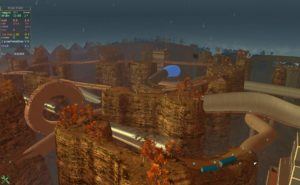
Introduced later in game. Pipes are difficult to drive on them (and easy inside). This happens because you can fall out easily. Being on center is crucial for straight road, but in turns finding the right place can be tricky and fun. This screen is from Industrial, a heavy and long track that has most of it driven on pipe. There is also DangerRoad which has full on-pipe drive and thus is very difficult.
On pipe loops were probably the most difficult stunt element. It’s very difficult not to fall off and tricky to stay center until end of it.
Jumps
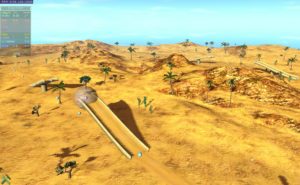
Were also quite early. But a bit more problematic for the simulation. Car suspension has to be stiff to land well and usually the tolerance of speed is narrow (i.e. too little won’t jump across and too much will land badly and roll over).
At first they weren’t open. At some time a new hidden material (-1) was introduced and they started to look well. Shown here is one of first tracks with them. Also, notice the spheres on ground between jumps. This was the first way and isn’t the best. Having those single points higher than jumps is better since, the auto pitch (of road) will make jump ends go straight into sky, and not turn lower like here.
Fortunately it is easy to select both jump end points and move them up. Or select all jump segments and then: move, rotate, scale or copy them.
This track Platforms (left) has many jumps. Version 2.6 has introduced Pacenotes system to the game. And added an extra text showing required / minimal vehicle speed to jump across. An original idea and track using it was PipeJumps (right).
Other tracks with many jumps are: CrossJumps, TopTwist, Scorpio, Mars, JumpCrazy, HighJumps, Abyss.
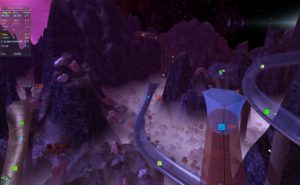
Terrain – Layers
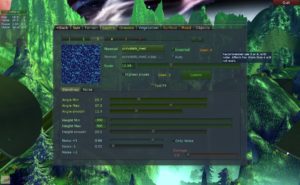
Terrain is using OGRE terrain component with additions from shiny material generator. Due to limits of shader texture units and using 1 pass, it can have maximum 4 layers.
Each layer is a set of 2 textures, 1 having diffuse+specular and 1 with normal+height data. In practice an example for 4 layers would be: grass (or sand), other grass or mud, rocks, snowy rocks. The more are used the worse performance, but 3 or 4 look best. We have 6 layer tabs and enable checkboxes just for convenience.
We have a huge number of textures (109) mainly 1k size, CC0 licensed, pack and info here. This gives a great base for the variety of our sceneries.
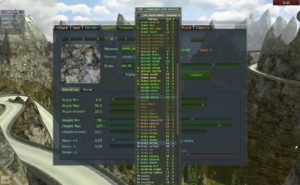
There is a pick list with all available. It also fills scale. It is a very important parameter. We don’t want to much texture repeat and on the other hand we can’t have them stretched too much (or just have unrealistic size).
Another important aspect is where the layer will appear. We can customize this by telling terrain angles range, and also height range. For example: sand at 0m level and below, grass otherwise, but not higher than 50m and additionally mountains if terrain angle is higher than e.g. 22 degrees. Layer painting is not implemented and not really needed. It would be sometimes useful though to have some manual feature. But otherwise this system saves artists time to decorate terrain.
Noise
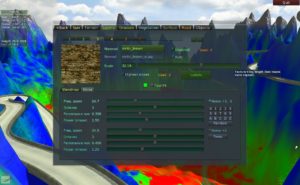
Also each layer can additionally have noise, that can blend into next+1, next+2, or previous -1 layers. Each has own slider, giving 3 factors total. This allows e.g. the first (sand) layer having spots of second and third in other places, making it more unique and less repeating. Also the last (mountains) layer can have spots from previous. Example shown here on picture, from track HighPeaks.
Blendmap
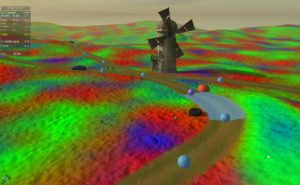
Blendmap is the texture that will have information of how to finally blend layers on terrain. There is a helpful visualization for it (Test F9), shown on picture. When done well, it should show Red, Green, Blue colors, mostly separated (and White when 4 layers). Even if this track is flat and small and dense with grasses, it has 3 mixing terrain layers.
Advanced
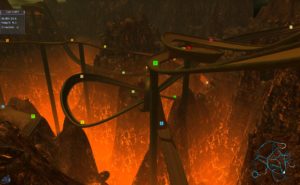
There are some extra parameters for terrain, rarely changed. The sliders are shown in next chapter heightmap below.
Terrain can emit light i.e. have emissive layer. This has a checkbox to turn on, and a slider for scale. It will disable normal specular light though, instead using it for emissive map.
An example here is lava e.g. on Crematoria, Craters. Without it the look would be too dull and unrealistic. And others examples on Radioactive, Magic, Wild.
Next, normals scale and specular power change terrain lighting as whole.
Terrain heightmap
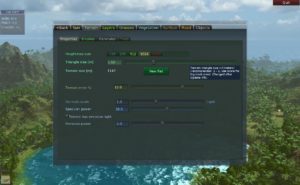
On terrain tab we got parameters that setup the heightmap. It will always be square grid. But larger maps need more area. Heightmap size can only be power of two. It also decreases performance when high and additionally makes track bigger on disk. So 2048 should never be used. And if track isn’t big, 512 should be good.
Once set it shouldn’t be changed. But there is a button on Tools tab, to half the value, as a last resort to make track have more Fps (better performance).
Triangle size is a real number and it can be scaled freely. But recommended is the size of 1-2 meters, since if too big it doesn’t feel real when driving. The resulting size in meters (side length) is computed and shown here too.
Terrain brushes
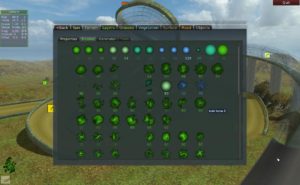
Having good looking terrain means putting some time to paint it. It is like a canvas for an artist. Best to paint in each place and also using different brushes. It’s also good practice to decorate terrain more, after road is final.
We have 4 types of brushes: Deform, Smooth, Filter and Height set. All brushes have common factors like radius (size) and intensity (strength).
Deform can make terrain lower or higher, by factors from brush. The simplest are of course just a solid sinus circle, most effective in center and not at all on borders. Smooth brush will tend to flatten terrain in place, it was made first, and sometimes needed. Better and new is the Filter brush. Filter brush can fix all your problems (except real life ones). It smooths terrain without loosing shape, it is a filter that reduces high frequencies (noise) on terrain. Also has a parameter for kernel radius. Height brush sets a height value in place. The value can be adjusted with mouse. It can create flat place

There are several terrain brush presets, shown here on screens. The first row is just the basic circle tools with different type, radius and intensity. The rest is various deform with noise presets. And last 2 rows have fancy regular shapes. Below each image there is a number with radius. Also hints show a name, but image is mostly sufficient.
Terrain – Generator
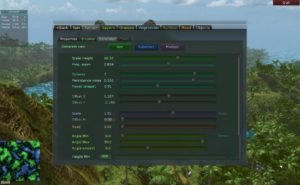
Terrain generator is a great start for tracks. Especially those big, scenic, nature tracks. It isn’t enough to just use it, manual painting gives unique feel and character.
It is a functionality that generates noise, the size of whole terrain. Preview of it is shown in left bottom corner. It has many parameters available on sliders. Like with every slider, clicking RMB on it will reset value. The resulting noise can be moved around with offset and scaled to real heights. Clicking buttons can either Add that to the terrain, Subtract or Multiply it with. Thus multiple uses are possible. It can also ignore road, so be used even after road was placed on terrain, but need adjusting bridge ends then.
The generator inspired creating Spikeland track and JungleCanyons.
Tools
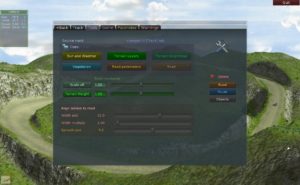
Align Terrain to Road is a very useful tool. It is shown in a video here. It has own test track that demonstrates the result. The tool needs a road with selected segments. Road needs to be in air (bridge, otherwise nothing is needed). Upon using it will adjust terrain heights so it ends to be where bridge road was. Then road can go On Terrain instead of bridge, preserving shape. It also has 3 sliders for smoothing terrain a bit to the road on borders for small distance.
Other tools available here are from top, the ability to copy various things from other track to current. On Track tab there is a button set as copy source, so once another track is picked and button clicked, we can use buttons on Tools tab to copy stuff from it. E.g. Vegetation, Sun and weather, Terrain layers, Road parameters etc.
There are Delete buttons here too. Since there is no new track, just duplicate, you may want to delete various things like Road, Fluids, Objects for your new track.
Lastly on this tab, we have scaling ability. One can scale whole track by factor from slider (and editbox) or scale just the terrain height. This is useful, since when driven after editing, track may feel too big, stretched out and it’s an easy fix by scaling it below 1.0. Contrary if it feels to big, above 1.0 can fix it. For compensation, terrain height can also be scaled.
Game setup
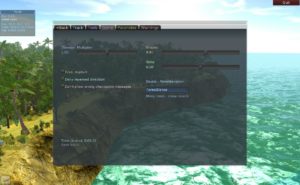
Game setup tab is quite new and unique. It actually has settings for the game, on this track.
So gravity, which is different on Mars and other planets.
New in version 2.6 of the game we have reverb sound effect on track for ambience feel. There are presets here in combobox to pick from.
Wind is present on track Sandstorm also lesser on Twister and here is its strength.
Damage multiplier is less than 1.0 on very difficult and long stunt tracks. Otherwise it wouldn’t be possible or too difficult to drive them until end.
Grasses
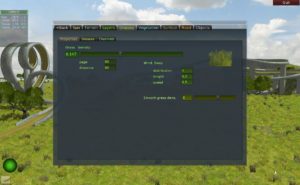
Grass is done with PagedGeometry plugin for OGRE. It also shows the same old approach and enforces things that wouldn’t be done today. Namely the page size. Which is a constant value used for optimizing view and reducing drawn batches.
Main page with properties has the slider for global grass density, it’s the first thing to adjust.
Also present here are grass sway (from wind) parameters. They were rarely changed, and added late. Smooth parameter makes the transition from road to grass more natural and less sudden. It blurs the grass density map.
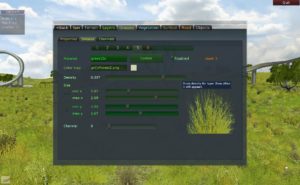
Next tab has more options.
Here you can actually pick grasses, and see the texture on right, to check its look.
Then adjust its vertical and horizontal size ranges (x,y min and max).
Each grass also has its own density.
There is a color map, picked from combo to slightly adjust final color.
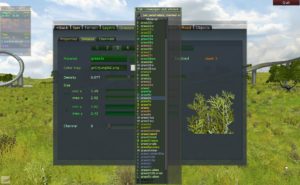
Grasses can be picked from another long colored list, that helps finding particular types. Picking can also auto set parameters for faster change.
After change either press V twice to disable and enable vegetation showing or press Update (F8).
Grass channels
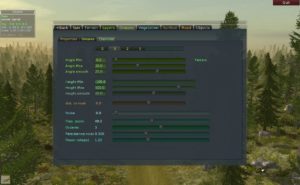
Grass channels are optional. But useful for different grass setups, e.g. regular forest grass and other one appearing in snowy mountain parts.
In more detail you pick a channel for each grass. A channel has common parameters for terrain like its height and angle ranges. And other parameters for noise and road distance.
Vegetation
Vegetation here means: trees, rocks, ferns, mushrooms etc. Basically everything natural that repeats a lot and is automatically placed on track, basing on terrain.
It uses the PagedGeometry component (unfortunately not Instancing) and comes from an old era, when meshes were batched on CPU into larger pages, to reduce batch count of single meshes. At distance meshes are displayed as flat billboards called impostors, prerendered at few angles and cached on disk for later.
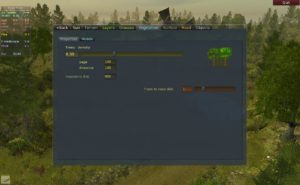
The key parameter in properties is density, which is global for whole track’s vegetation.
The same page size as for grass is also here, just with different values. Also distance which is basically the same as page and impostors distance, at which trees will be flat billboards.
Usually tweaked for each track to optimize batches draw versus triangle count. Higher size pages will create lag and make more triangles, while lower would visually switch more and create more batches.
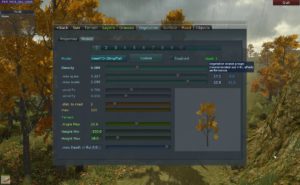
On next tab, individual Models are picked and and their properties adjusted.
Main are density and size range.
Next useful are road distance (could be e.g. higher for trees and lower for ferns).
And the same terrain properties: height and angle ranges, where this model can appear on track.
Lastly fluid depth allows excluding models from water, mud etc. It can allow few meters submerge.
It is recommended to use 4 to 6 models. It depends on count, but generally more models will mean lower Fps, more lag, etc.
As for grasses, to see the change change either press V twice or press Update (F8).
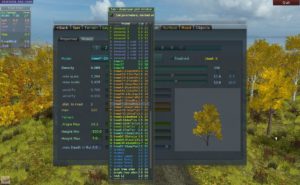
As before for grasses, you can also see the long pick list here for finding models. They are colored with scenery color (same as tracks) and can also auto set few parameters when picked.
Provided here is the 3D view of rotating model. And the numbers above it are real size after scaling, min and max values. This way you can get an idea of size and compare it to e.g. real life size of a tree.
After the density slider is the actual count of occurrences for this model on track.
Fluids
By fluids I mean water (mostly), mud (few types) and other special ones like acid, lava, ice.

Here you can see the water, depth map, which is made by editor, making deeper water appear more dark and also transition smoothly to terrain.
Fluids are just rectangular areas moved and sized by mouse. While editing depth map is disabled.
You can also change their depth. This could allow more than one at different heights on track. I think this wasn’t used though.
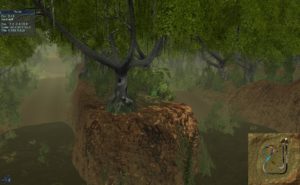
Mud has 3 basic types: slippery (light), medium and hard (dense, dark), giving different friction when submerged. Next 3 types have a modulation for direction to not be so linear.
The most intensive fluid/mud tracks are: MudMad, MudBath, MudFlats, Swamp, Muddy, Temple.
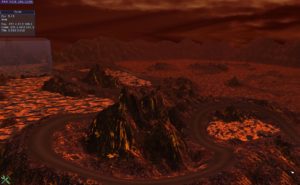
Solid fluids (introduced recently) are rigid and can be driven on, e.g. hard lava, ice.
Damage can happen from lava (and acid).
Present on tracks: LavaPools, IcyRiver.
Objects
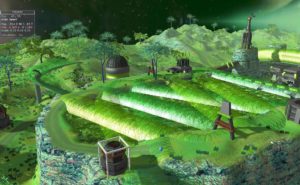
Objects were featured a bit later in game and are a quite essential part of every editor.
Static object allow placing a mesh like rock, cave, building, obstacle, statue, balloon, etc.
They can be moved, rotated and scaled freely. There is also multi select option (similarly to road points). Allowing faster manipulation for many at once.
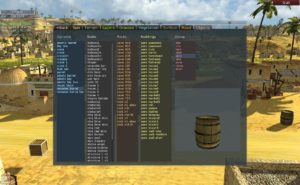
Dynamic objects are the ones you can hit in game and will move or fly away. They cannot be scaled, but otherwise are placed and edited the same way.
They have a special simulation mode in editor. It is meant to be turned on, so they can settle on the ground. Then turned off and track can be saved. This is to save the game from doing that on each track loaded. Thus game creates them all in asleep (not moving) mode.
Shown here on screen are the lists with object types. Dynamic ones are in blue on left. Rest is static. Single ones are in white list. Rocks and caves have special, orange column. And lastly buildings in yellow. Since there are many of them, they have another short list with categories, that upon picking will fill the buildings list.
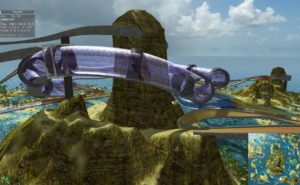
Obstacles were introduced later by contributors and are a great way to make driving in pipes more difficult and also have some surprising sections on tracks too. Possibly for decorating too. They don’t move with road so are meant to be placed rather as last. Changing road would then require moving them accordingly.
Warnings
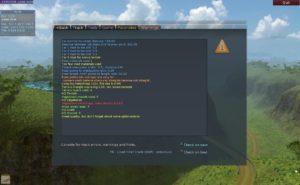
Last feature of editor is showing some warnings for things done bad or just not optimal for performance. By default checked on track save. A video shows the various things checked. Wiki page lists all.
Those are very simple checks for performance and some tracks (that reach the graphics limits of old OGRE) can have warnings.
Also road system, checkpoints and car start warnings are here.
Settings
Editor has also a tab with settings, where you can adjust e.g. minimap, camera speed and intertia, road points size, startup options, etc. Also jumping camera to track start, or predefined views.
It also features a basic but functional material tweaker, on Settings – Tweak tab. When picked material in combobox, it will show editboxes and slider and allow adjusting its parameters in real-time. Very useful for creating new materials, fluids and tweaking colors.